{"section":"tutorials","requestedLocale":"en","requestedSlug":"configure-template-in-smartcheckout-update","locale":"en","slug":"configure-template-in-smartcheckout-update","path":"docs/en/tutorials/checkout/checkout-settings/configure-template-in-smartcheckout-update.md","branch":"main","content":"The __Portal__ is used to render __Checkout__ (cart, personal data, address, payment method) and __OrderPlaced__ (buying confirmation screen) screens. In this article it will be presented how to register and configure the resources of the Portal. \n\nThe __Checkout__ module in the Admin, displays the sites that are registered for your account. Through it, it is also possible to create a new website, edit and configure information about existing websites.\n\n> ℹ️ Each registered site corresponds to a multidomain (if the account has contracted multidomains). For accounts that do not use multidomains, it is not necessary to register more than one site in this module. Learn more at [Create a multistore/multidomain](/en/docs/tutorials/managing-a-multistore).\n\n## Creating a new website\n\n1. In the VTEX Admin, go to __Store Settings > Storefront > Checkout__, or type __Checkout__ in the search bar at the top of the page.\n2. Click on the `New Site` button.\n3. Fill in the following fields:\n\n
\n - **Name**: enter here the desired name for the site.
\n - **Store**: fill in with the account name, which can be found at **Account Settings > Account Management > Accounts > Account name**.
\n
\n4. Click `Save`.\n\nCreation of the new website:\n\n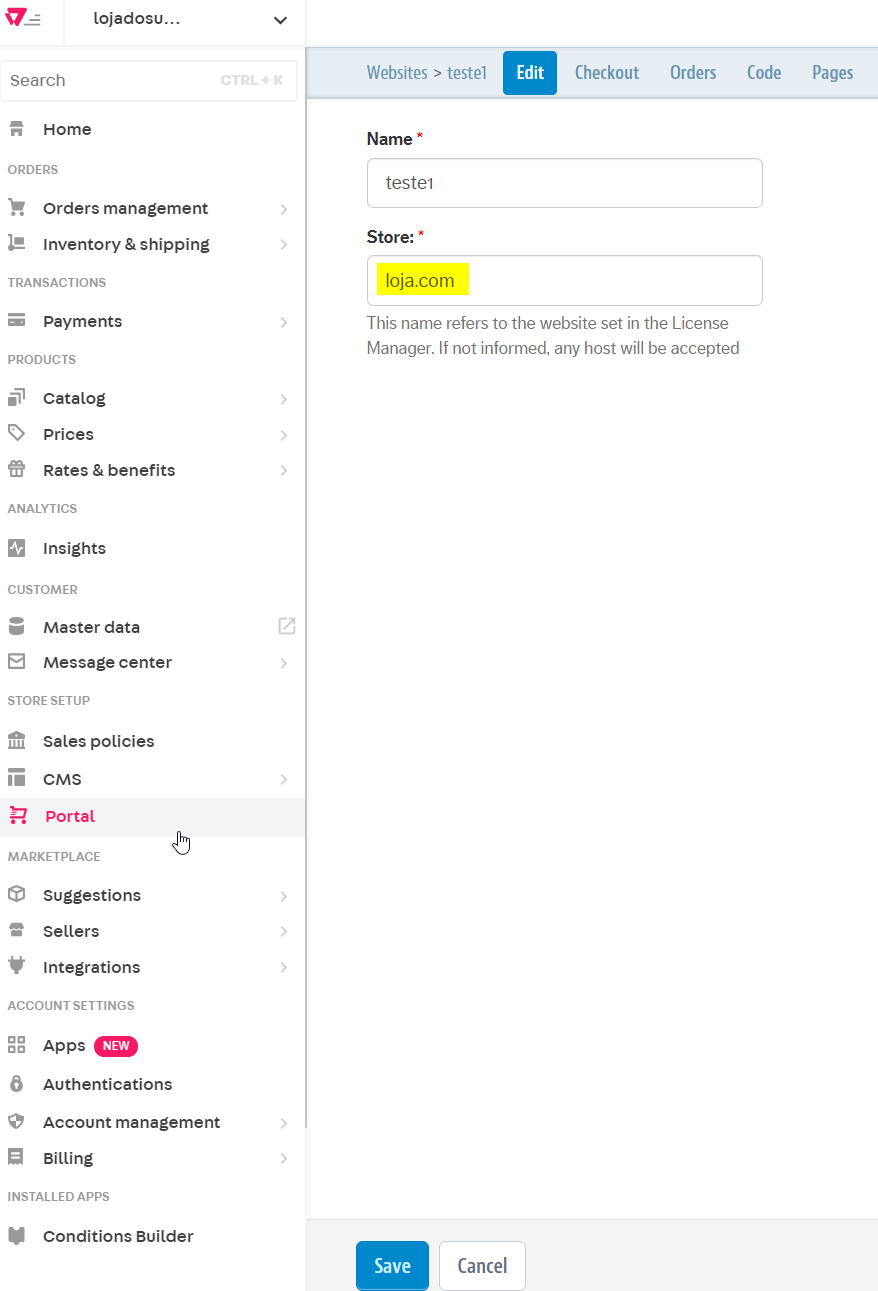\n\nAccount Name Access:\n\n 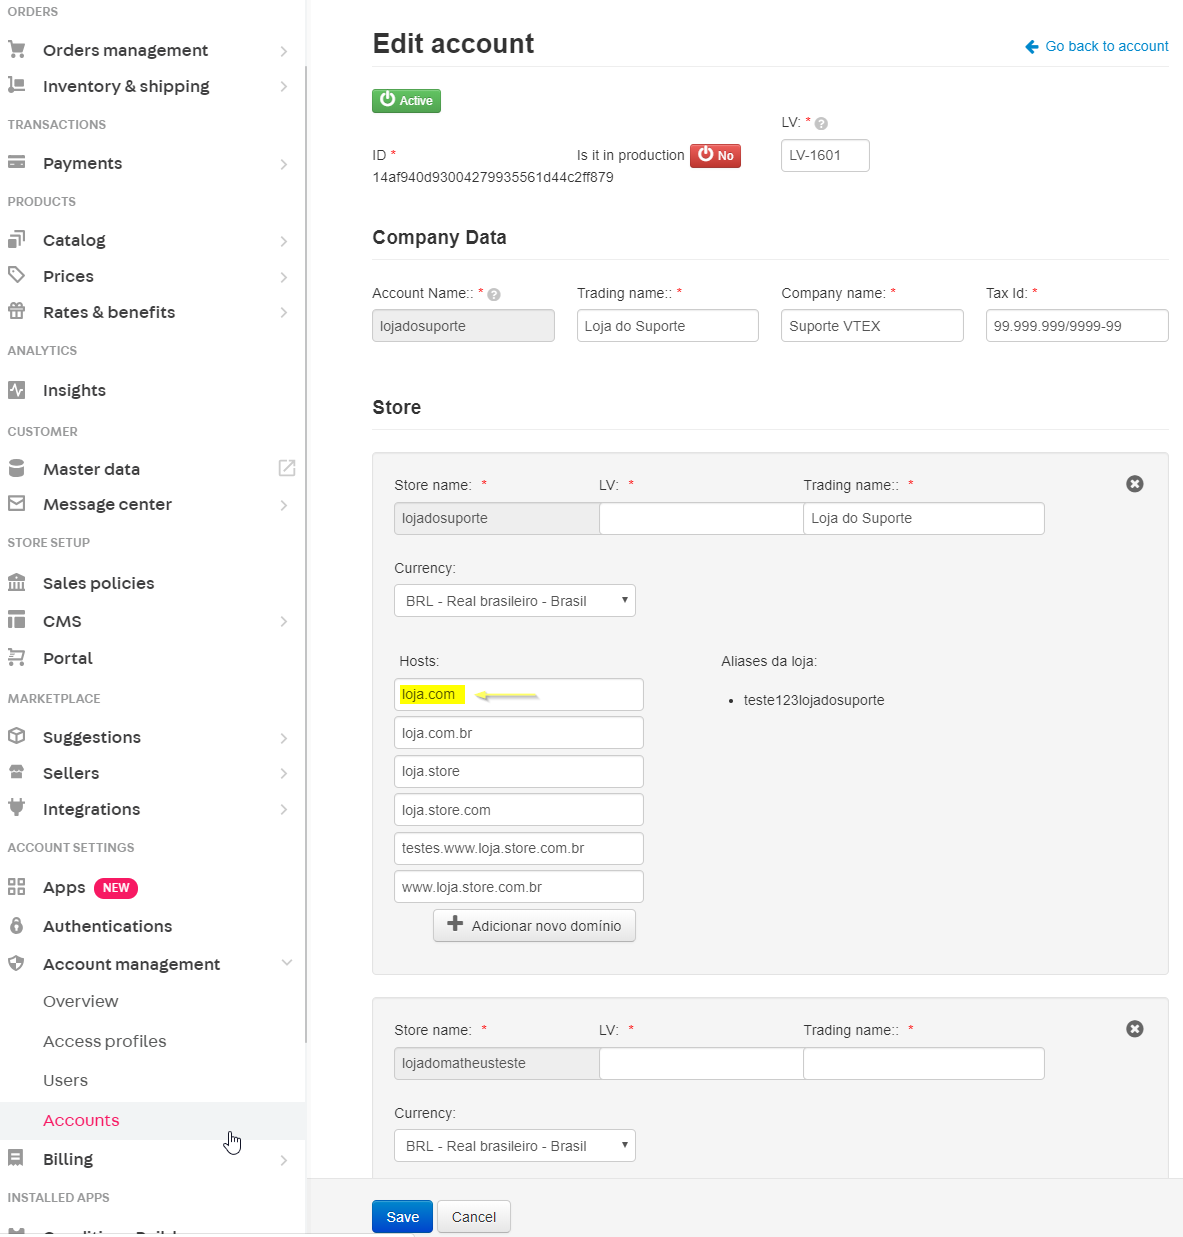\n\n## Editing and configuring website \n\n1. In the VTEX Admin, go to __Store Settings > Storefront > Checkout__, or type __Checkout__ in the search bar at the top of the page.\n2. Click on the icon of the desired website.\n3. By accessing the blue options menu located at the top of the page, you can perform the following actions:\n - __WebSites__: return to the home screen of the registered websites.\n - __Edit__: edit the \"Name\" and \"Store\".\n - __Checkout__: perform basic settings, such as Shipping Calculation, Google Tag Manager, among others.\n - __Orders__: set up cancellation and order replacement reasons.\n - __Code__: display and create website related templates.\n - __Pages__: display existing pages for the website.\n\nExample of existing sites in the same account:\n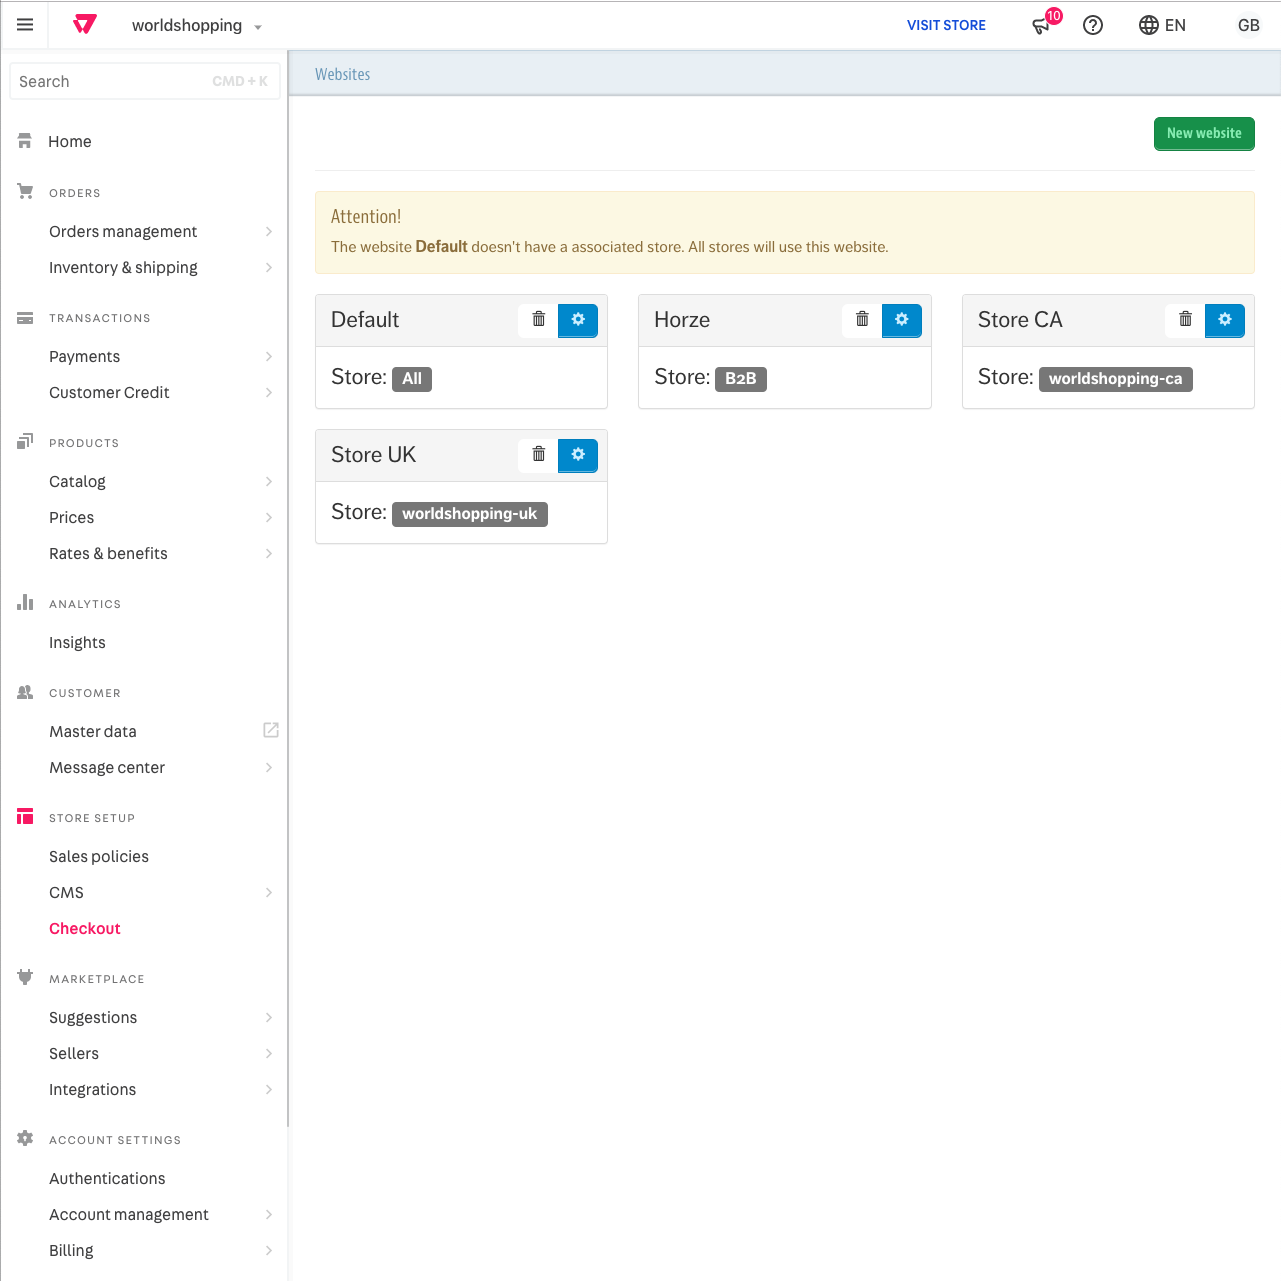\n\nExample of available pages for a website:\n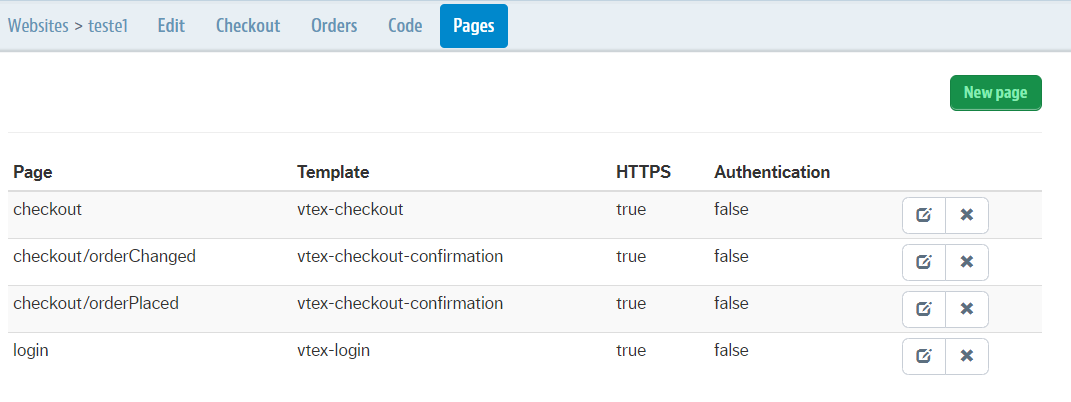\n\nIf you want to __delete__ a site, click on the delete button for the desired site, as in the example below:\n\n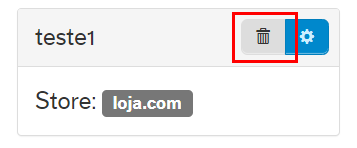\n\nWe'll now have a more in-depth look at the following options menu settings: __Code__ and __Checkout__, being responsible for configuring the pages *checkout* and *order placed* pages.\n\n## Configuring Checkout\n\n> ⚠️ Users need to have the [License Manager resource](/en/docs/tutorials/license-manager-resources) **Manage portal** assigned to their role to be able to configure store Checkout settings. In turn, the user that creates the new role needs to have **Owner (Admin Super)** access.\n\n1. In the VTEX Admin, go to __Store Settings > Storefront > Checkout__, or type __Checkout__ in the search bar at the top of the page.\n2. Click on the icon of the desired website.\n3. In the blue options menu at the top of the page, click __Checkout__ and configure the fields below as needed:\n\n
\n - **Website Title**: if informed, will be displayed in the title of the cart, checkout and confirmed order pages.
\n - **Google Tag Manager**: enter the ID (in `GTM-XXXX` format) of your container [Google Tag Manager](https://www.google.com/tagmanager/), if you want to use it automatically.
\n - **Google Maps API Key**: the key is used in two situations: when the Delivery function based on geographic coordinates is active or if the option to **Pickup in store**.
\n - **Calculation of Delivery Options (Beta and Stable)**: select whether the freight calculation will be done from the spreadsheet or by geolocation.
\n
\n\n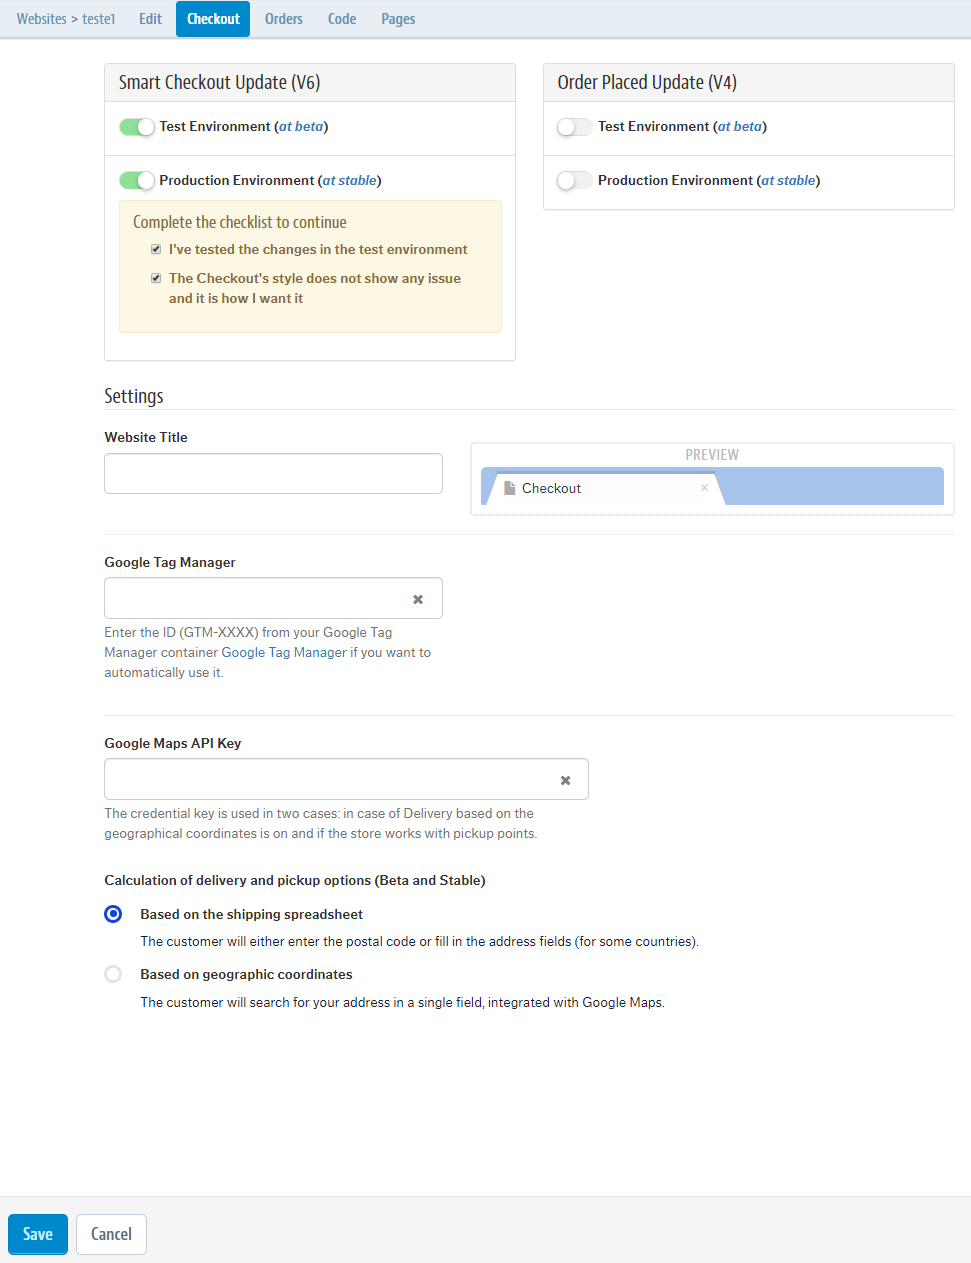\n\n## Configure code\n\n1. In the VTEX Admin, go to __Store Settings > Storefront > Checkout__, or type __Checkout__ in the search bar at the top of the page.\n2. Click on the icon of the desired website.\n3. In the blue options menu located at the top of the page, click on __Code__. A menu of __Files__ and __Templates__ will be displayed on the right with all the templates for your site, configured by the system.\n\nExample:\n\n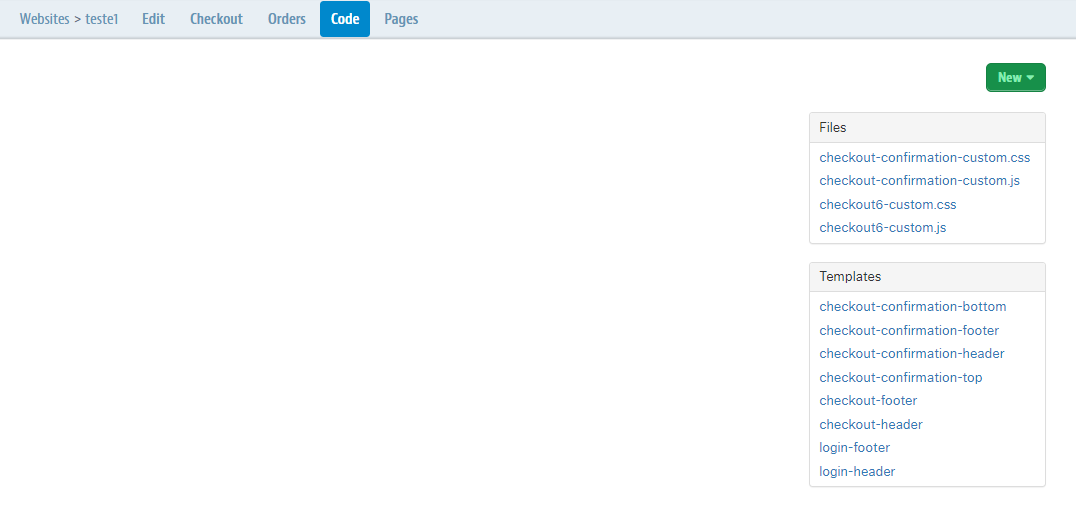\n\n### Configuring templates from the \"Code\" menu\n\nYou can customize the pages of your website, in addition to configuring other functionality through HTML, by accessing the __Files__ and __Templates__ menu.\n\nThe HTML code filled in the template corresponds to what will appear on the __checkout__ and __order placed__ pages of your site.\n\nOf the available templates, the only ones that cannot be changed are __vtex-checkout__ and __vtex-orderPlaced__. These correspond to the native functioning of the platform, rendering the main content of the __checkout__ and __order placed__ pages.\n\n> ⚠️ Javascripts included directly in any Portal templates will be ignored by the platform. The reason behind this is that only scripts that originated in Google Tag Manager are accepted by [SmartCheckout](/en/tutorial/smartcheckout-preenchimento-automatico-de-dados-do-cliente--2Nuu3xAFzdhIzJIldAdtan#). aTherefore, whenever you need to customize something (or even to insert specific tags) using javascript, do this through [Google Tag Manager](/en/tutorial/integration-with-google-tag-manager--frequentlyAskedQuestions_616#).\n\n### Examples of how to fill out templates\n\nBelow are examples of how the codes present in the __checkout-header__, __checkout-footer__, __vtex-checkout__ and __vtex-orderPlaced__ templates can be filled and their corresponding visualization in the website:\n\n- Template __checkout-header__ and website page header:\n\n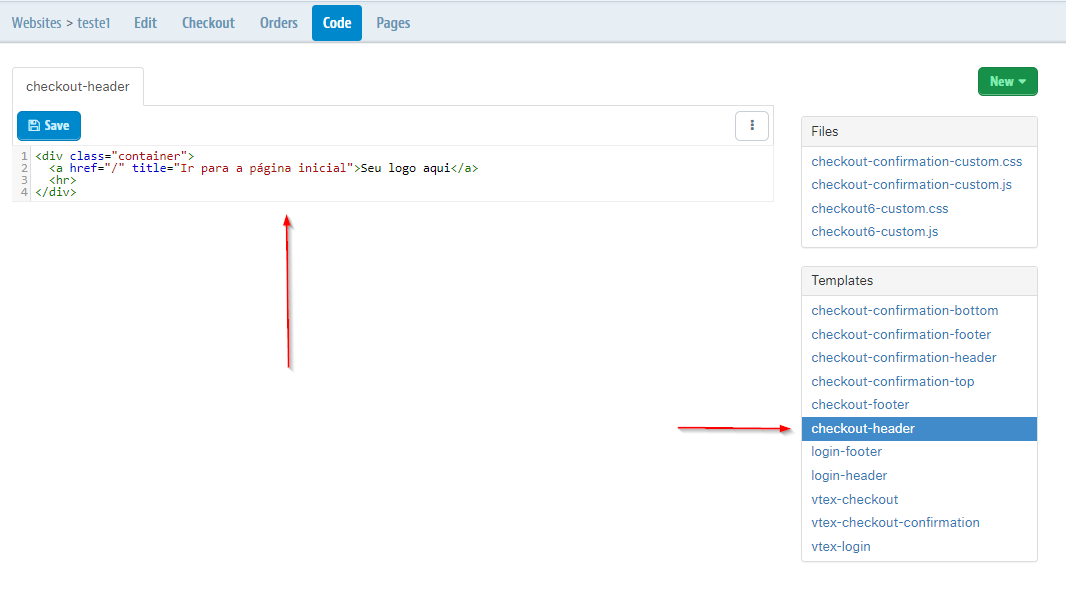 \n\n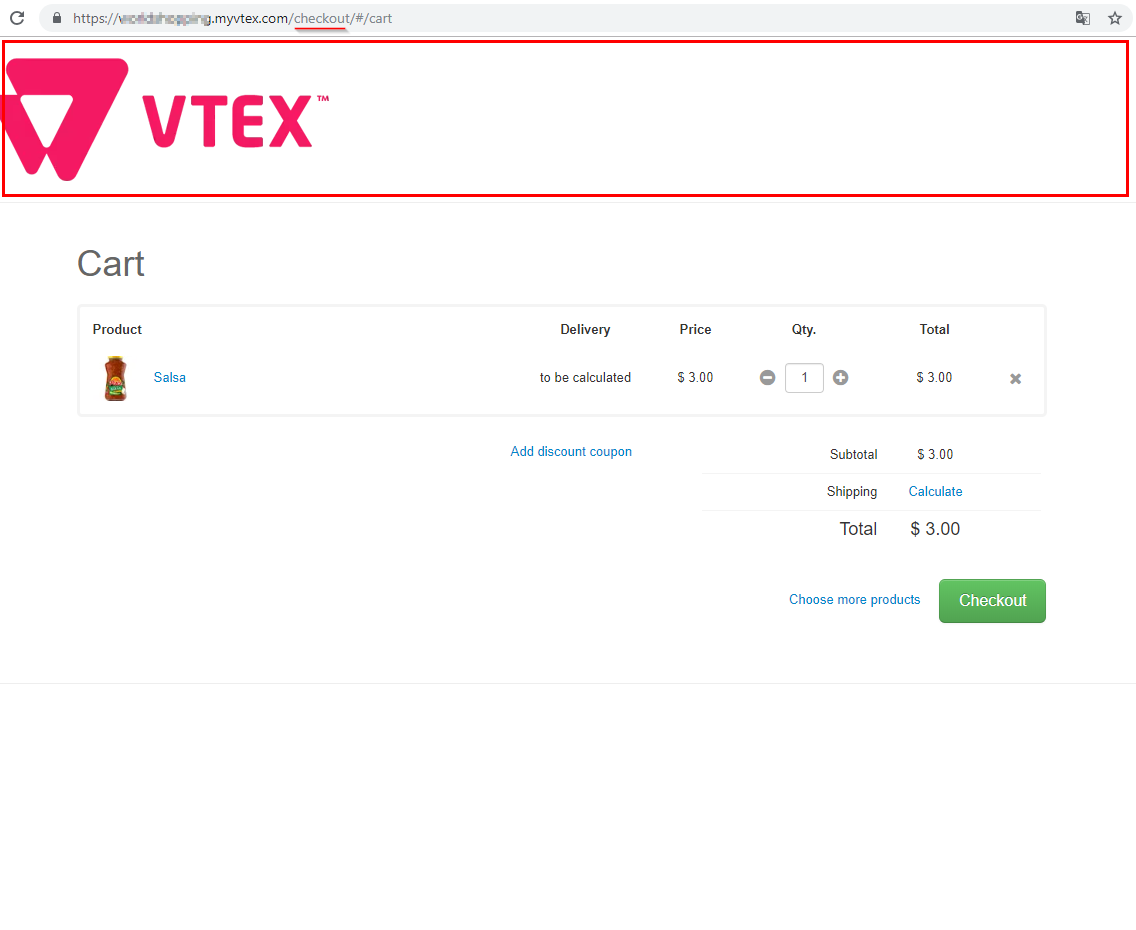\n\n- Template __checkout-footer__ and website page footer:\n\n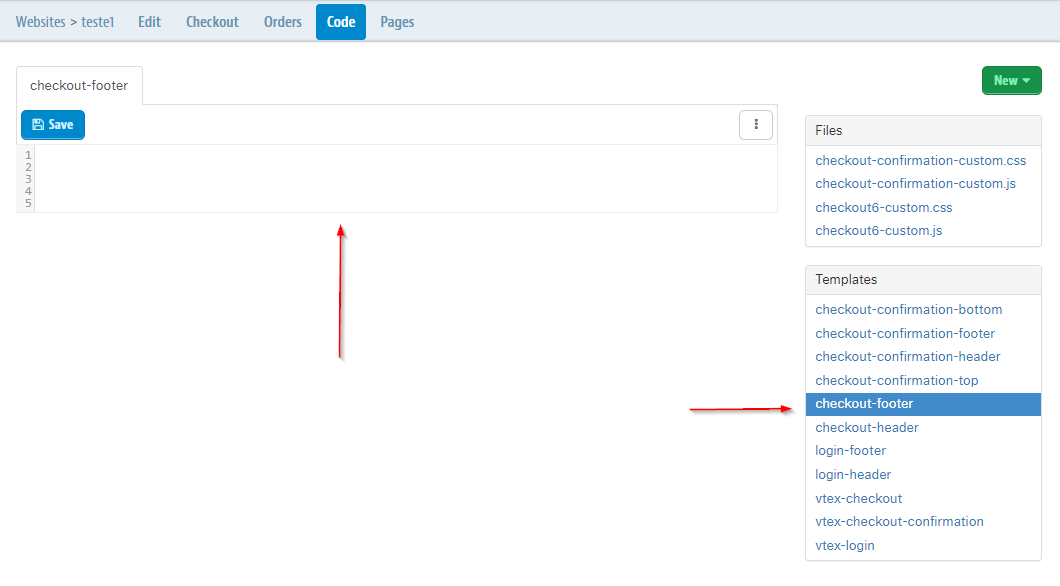\n\n 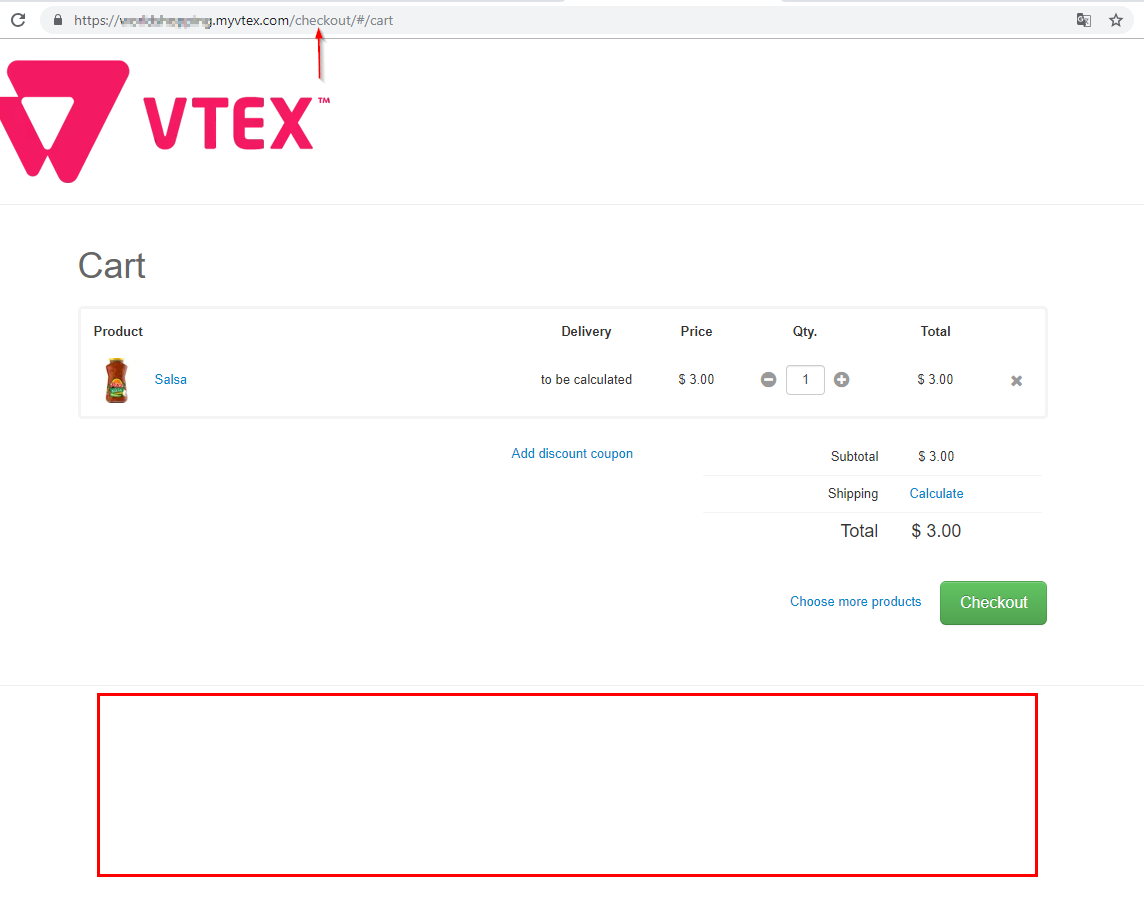\n\n- Template __vtex-checkout__ and cart page at Checkout:\n\n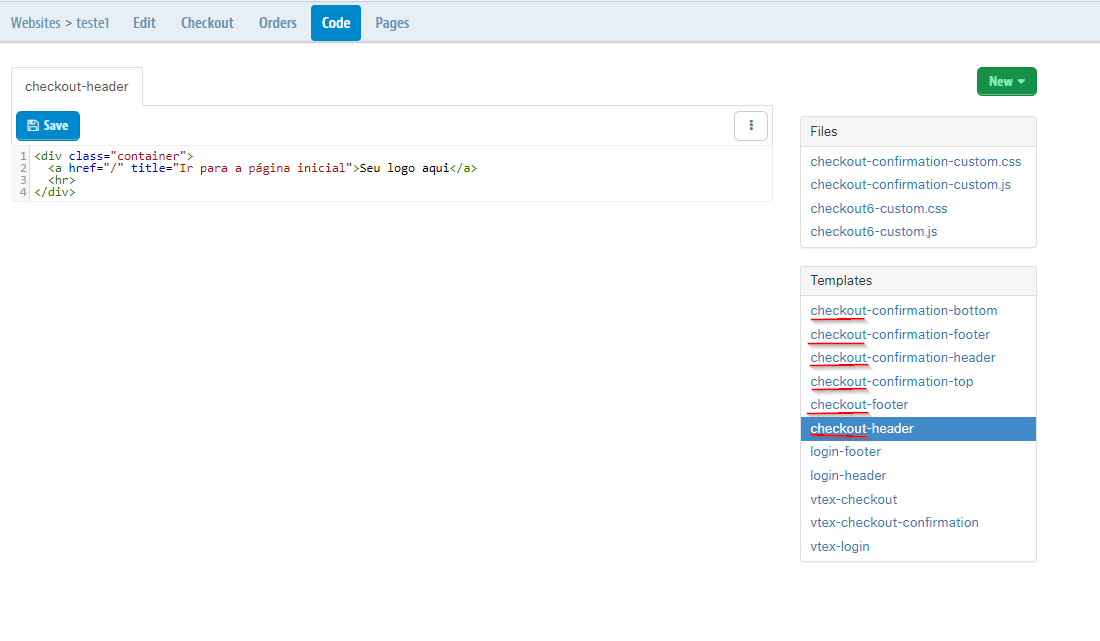 \n\n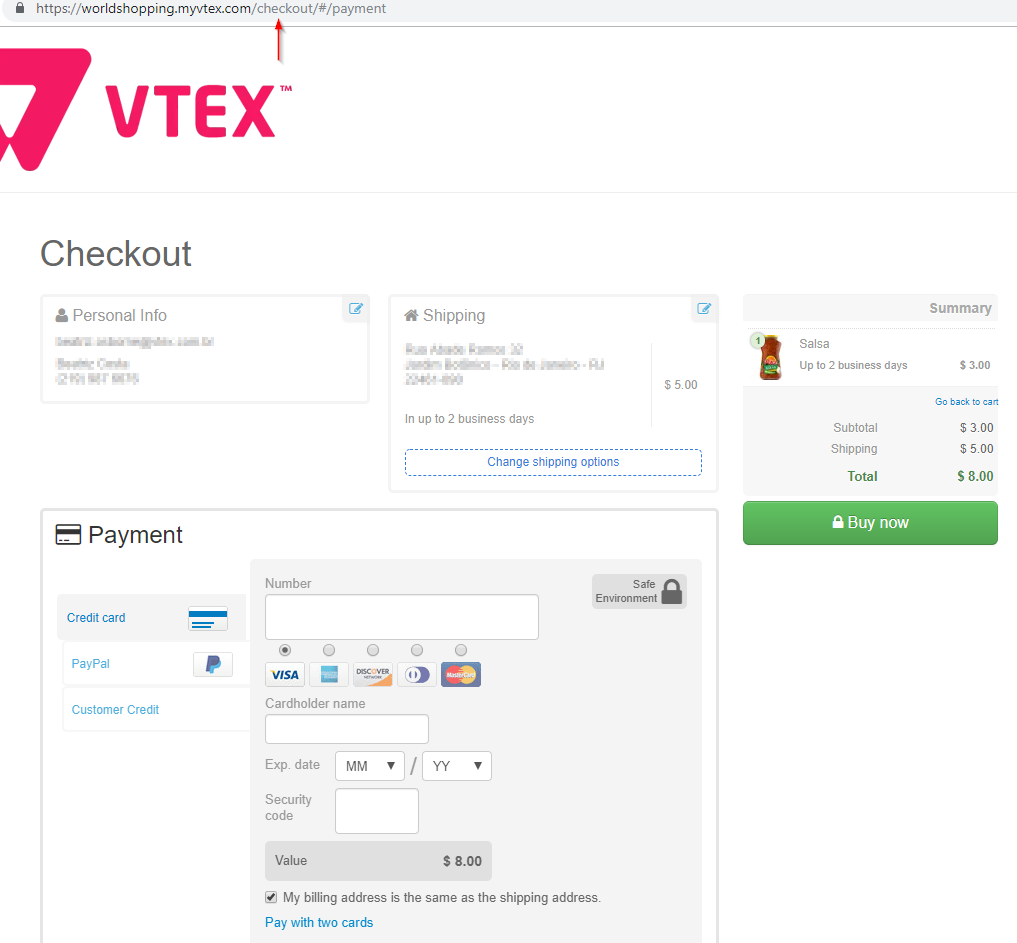\n\n- Template __vtex-orderPlaced__ and confirmed order page:\n\n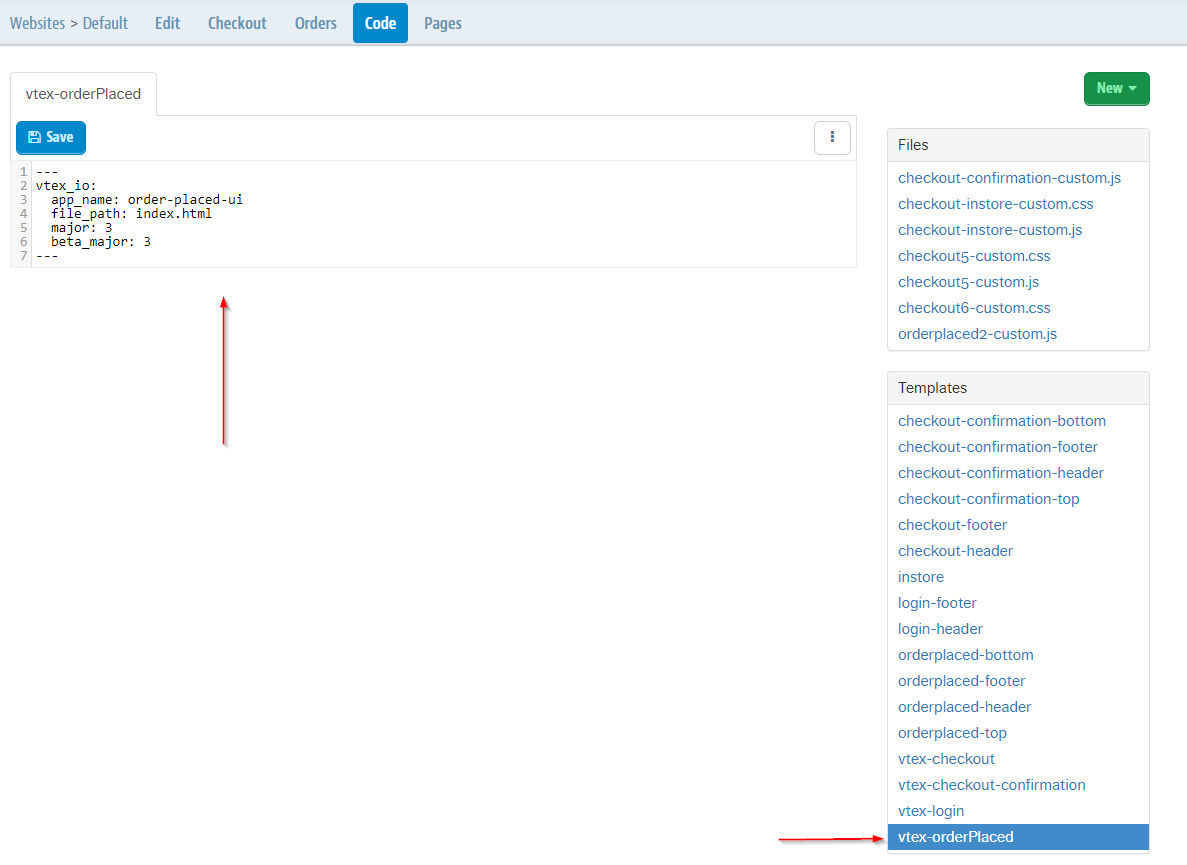\n\n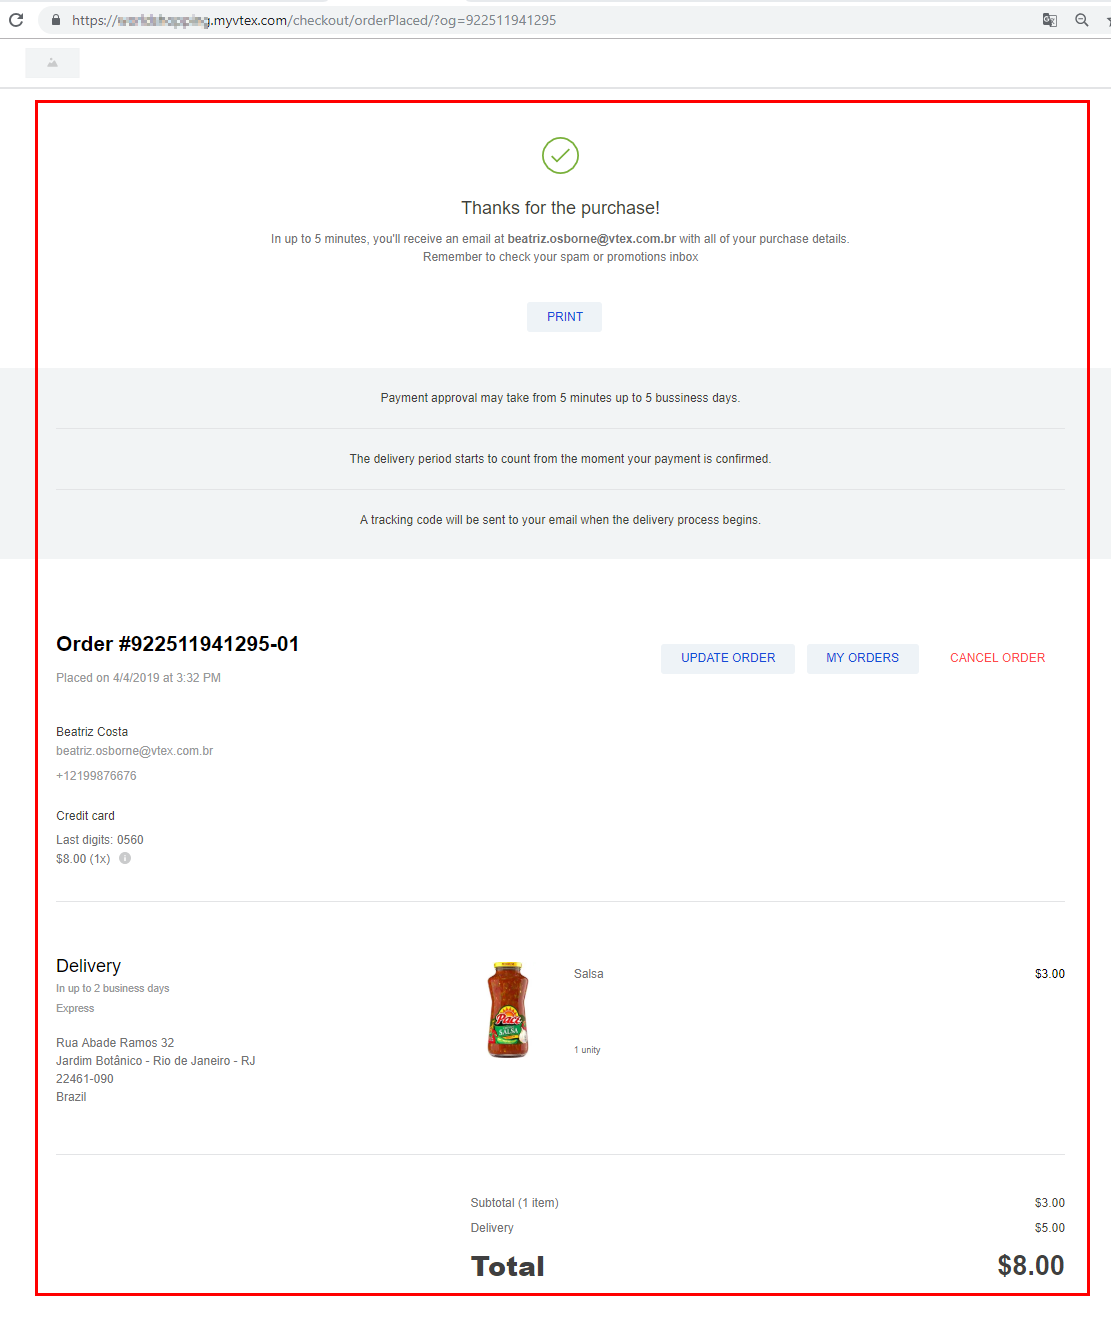\n\n### Multi-domain accounts\n\nMulti-domain accounts can use just one site if no specifics configuration requirements are present. This is possible because, even tough just one site is used, the platform includes a class in the \"body\" tag, according to the accessed domain. Therefore, applying different layouts to the same site is made simple.\n\nAn example of a \"body\" tag that's inserted according to the accessed domain:\n\n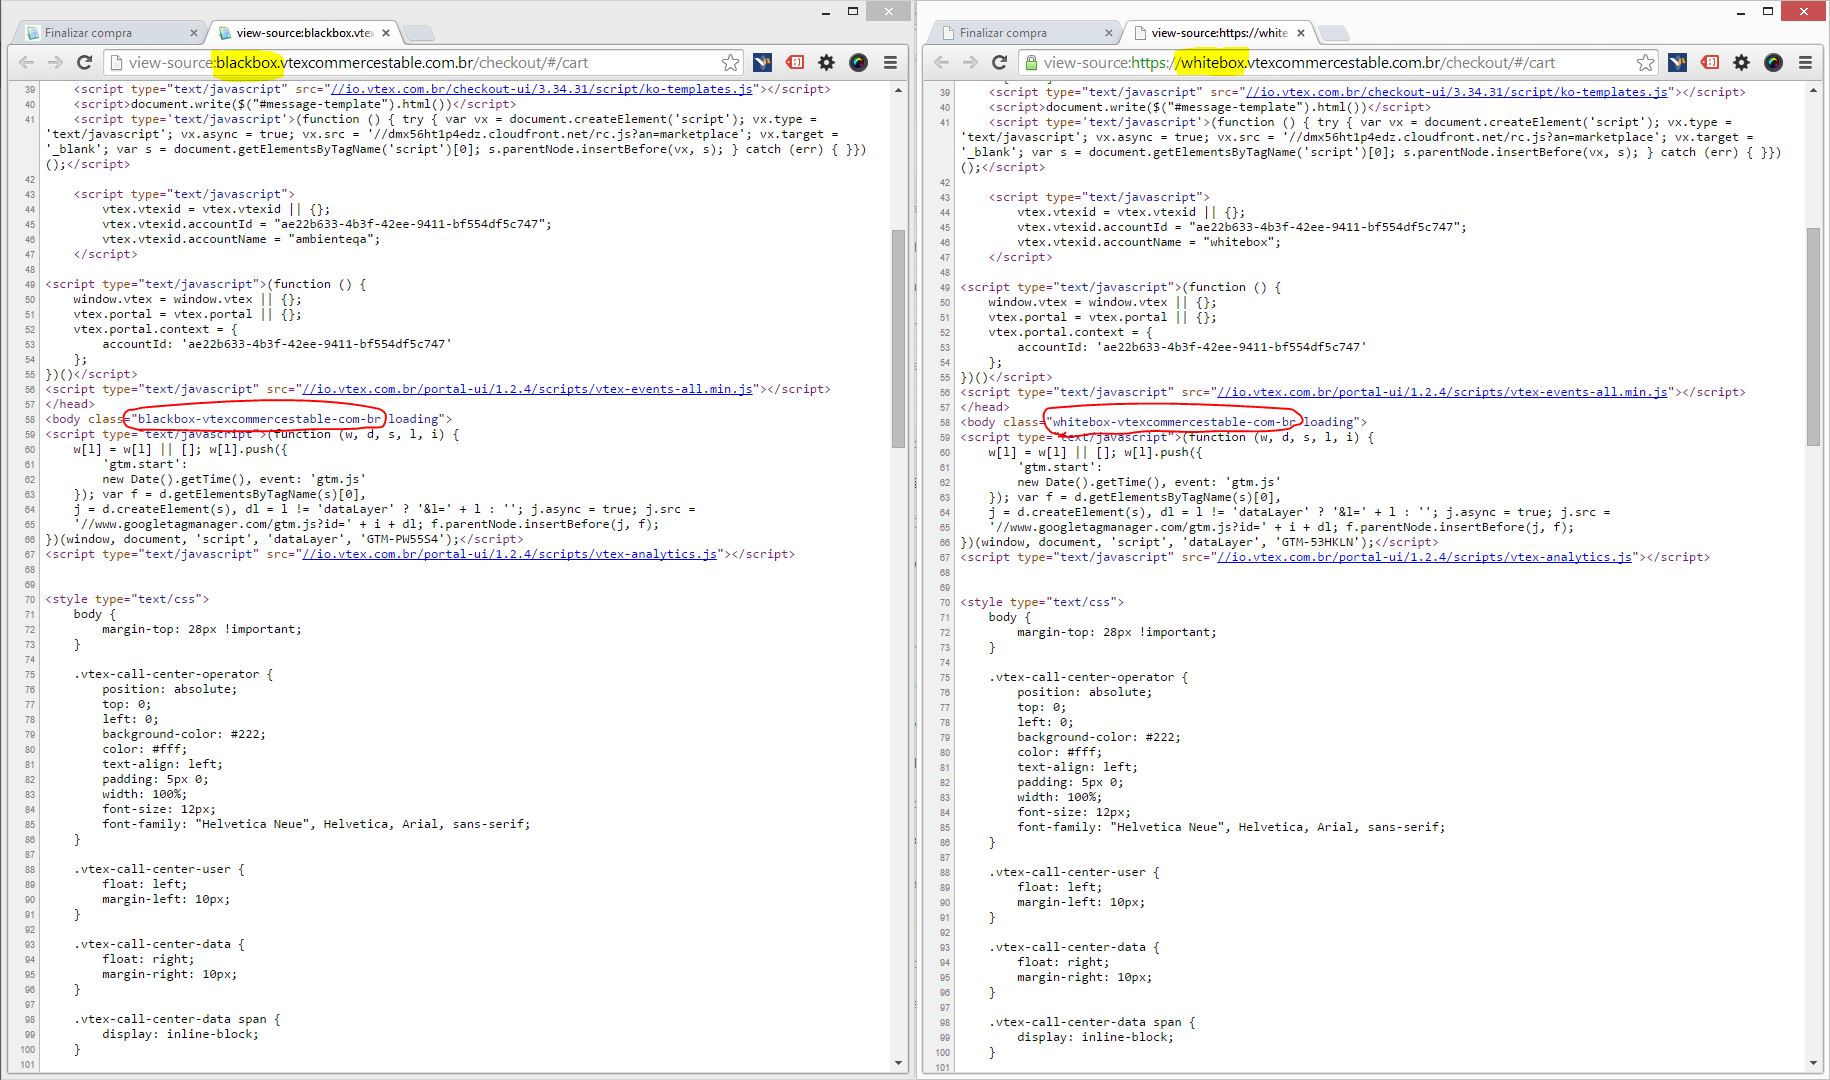"}