{"section":"tutorials","requestedLocale":"en","requestedSlug":"creating-collections-beta","locale":"en","slug":"creating-collections-beta","path":"docs/en/tutorials/catalog/collection/creating-collections-beta.md","branch":"main","content":"> ℹ️ There are two ways to configure collections, through the **CMS** or using the **Collections (Beta)** module. This article is about configuring collections through the **Collections (Beta)** module. This feature is in Beta stage and available for environments starting from Admin v3. If you have any questions, please [contact our Support team](https://support.vtex.com/hc/en-us/requests).\n\nThe new __Collections (Beta)__ module allows you to create and manage collections in a practical and quick way. \n\nBy grouping related products into collections, you create a discovery process for your customers, leading them to find new products, buy more, and have a better buying experience.\n\nThis article explains how to:\n\n- Create a new collection.\n- Add or remove products from the collection.\n- Change the item position in the collection.\n- Export your collection as a spreadsheet.\n- Edit or delete a collection.\n\n## Prerequisite\n\nTo create a collection, you must have the _Owner (Admin Super)_ [role](/en/docs/tutorials/roles) or create another role with the **Write Collections** feature enabled in the **Collections** section of the **Catalog** profiles. Find out more on our documentation about [Creating a role](/en/docs/tutorials/roles#creating-a-role).\n\n## Create a collection\n\nFollow the step by step below to add a new collection:\n\n1. In the VTEX Admin, go to **Catalog**, or type **Catalog** in the search bar at the top of the page.\n2. Click on **Collections**.\n3. Click on the `Create Collection` button.\n4. Fill in the [Collection fields](/en/docs/tutorials/creating-collections-beta#collection-data-fields).\n5. Click on `Create` to update the information filled in the form.\n6. Then, [select the products](/en/docs/tutorials/creating-collections-beta#products-selection) that will be part of the collection.\n\n> ℹ️ Note that the collections created in this module are not automatically changed. Automatic collections - made by applying filters - cannot be configured in the module.\n\n### Collection data fields\n\nTo better understand the meaning of the data fields of a products collection, the complete description of each is given below:\n\n#### New Collection settings\n\n- **Collection Name:** the collection's name. This is a mandatory field.\n > ❗ Don’t use special characters in the collection name.\n\n- **Simple description:** description for internal use, with the collection's details. It will not be used for search engines.\n- **Add products automatically:** automatically include products in the collection based on the selected criteria.\n\n#### Schedule\n\n- **Start date:**: collection start date and time. If a future date and time are set, the collection will have a scheduled status.\n- **Schedule collection end date:** selection that allows setting an expiration date and time for the collection\n- **End date:** collection end date and time. This field is displayed only if **Schedule collection end date** is enabled.\n\n#### Enable\n\n- **Add collection tag:** select this option if you want the collection to highlight specific products using a tag.\n- **Make collection searchable:** option to make the collection searchable in the store.\n\n### Products selection\n\nProducts can be added either by selecting items from the __Collection__ module list or importing a spreadsheet in CSV or XML format.\n\n#### Via VTEX Admin\n\nSelecting products through the VTEX Admin can be made using the product list, search bar and filters. You can search for a product using these parameters:\n\n- Product name.\n- Product ID.\n- SKU name.\n- SKU ID.\n- Product Reference.\n\nThere are many filters that can be selected to reduce the number of products displayed on the list.\n\n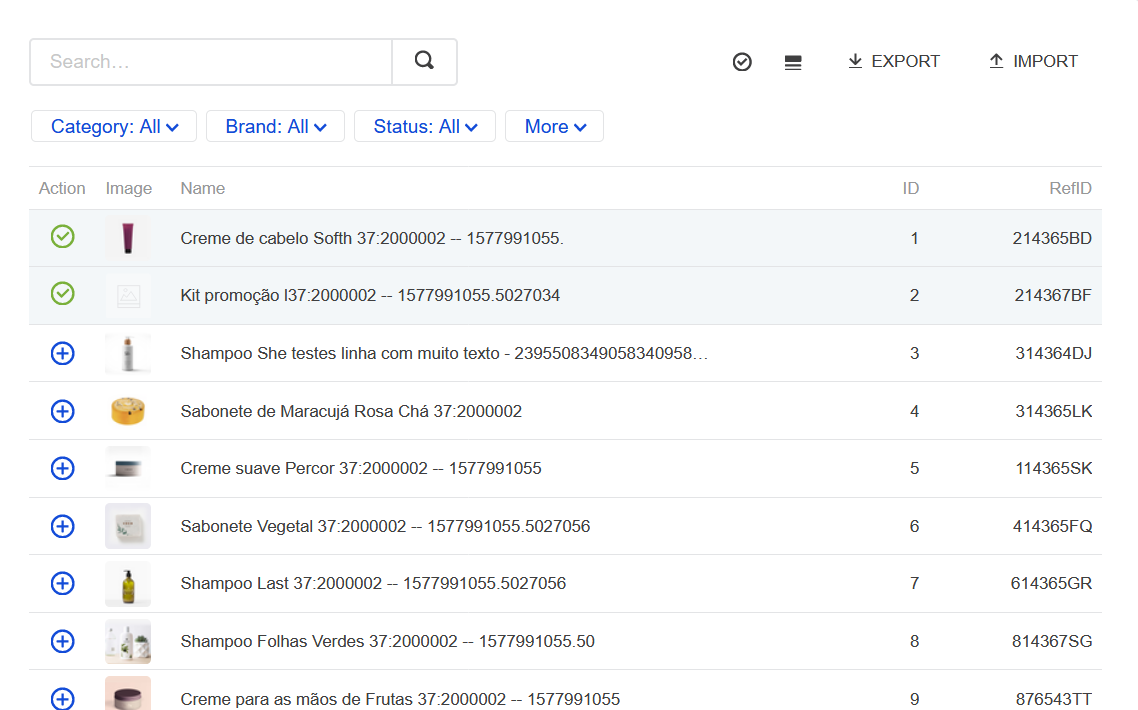\n\nYou can create new filters based on other criteria not covered by the predetermined filters. The images below show a few examples of these options:\n\n\n\n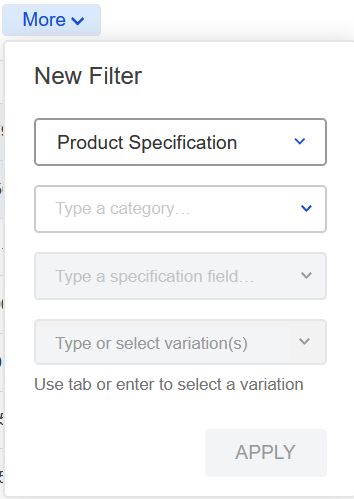\n\nTo add a product to a collection, click on the icon related to the product, thereby saving it in the collection automatically.\n\nFor more information about the item, click on the icon to open the product page or click on the image to enlarge it.\n\n\n\nIf you want to add in bulk, apply one of the filters and click on the `Add All` button. It is worth noting that the product must have at least one existing SKU to be included in a collection.\n\n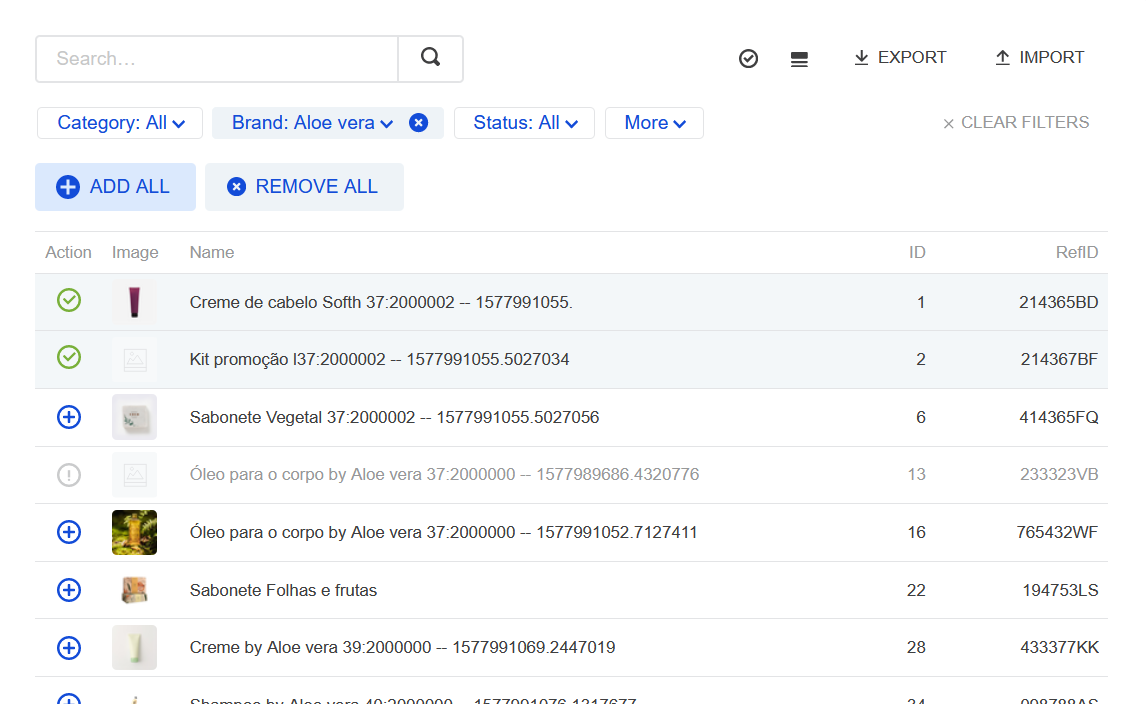\n\n> ❗ Do not bulk add more than 150,000 products. This may affect the indexing of the Catalog and the operation of your store.\n\n#### By spreadsheet\n\n> ℹ️ The maximum limit for import and export is 10,000 SKUs per operation.\n\nYou can also add items to a collection using a spreadsheet by following the steps below:\n\n 1. In your collection's dashboard, click on the `Import` button.\n 2. Click on the **Include products in collection** option.\n 3. Click on the `Import` button.\n 4. Click on `Download Template` to have the correct spreadsheet template as the example below: \n 5. Fill in the spreadsheet with the Product IDs, RefIDs, or SKUs. Add a single ID on each line. Regardless of which ID you fill in, all SKUs for the selected product will be added to the collection after import.\n 6. After filling out the spreadsheet, save the changes, and import the document into the VTEX Admin. You can drop the file in the indicated area or click on **Choose a file**. Files in CSV or XML format are accepted.\n 7. To finish, click on `Import`.\n\n > ⚠️ The spreadsheet can contain up to 10,000 rows. However, in stores with a large catalog, we recommend including a maximum of 50 rows at a time to ensure the import works correctly.\n\n### Product removal\n\nProducts can be removed either by selecting items from the __Collections__ module list or importing an updated spreadsheet in CSV or XML format.\n\n#### Via Admin\n\nTo remove an item from the collection, simply click on the product's .\n\n\n\nIf you wish to remove in bulk, apply one of the filters and click on the `Remove All` button.\n\n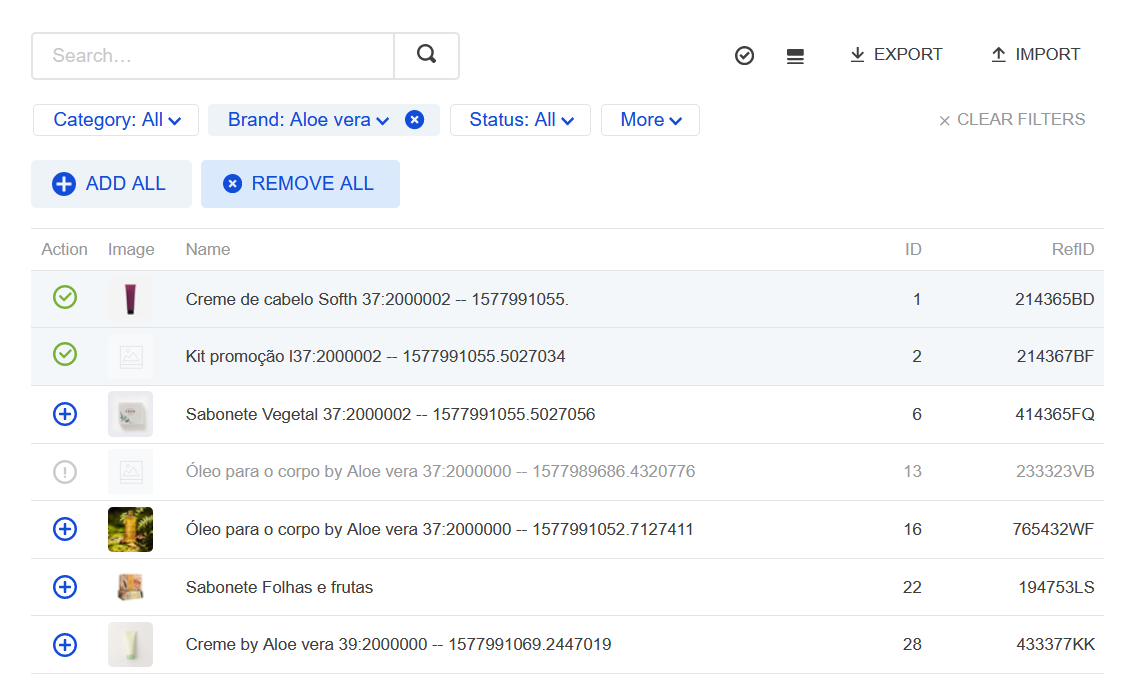\n\nYou can also click on the button (**Products in this collection**) in the top bar and then click `Remove All`.\n\n> ❗ Do not bulk remove more than 150,000 products. This may affect the indexing of the Catalog and the operation of your store.\n\n#### By spreadsheet\n\nYou can delete items from a collection by using a spreadsheet, as follows:\n\n1. In your collection's dashboard, click on the `Import` button.\n2. Click on the **Exclude products from collection** option, and then click on the `Import` button.\n3. Click on `Download Template` to have the correct spreadsheet template.\n4. After filling out the spreadsheet, submit it. You can drag and drop the file in the indicated area or click on **Choose a file**. Files in CSV or XML format are accepted.\n5. To finish, click on `Import`.\n\n### Change collection ordering\n\nTo change your collection's order, follow the steps below:\n\n1. In the __Collections__ page, click on the **My Collection** tab.\n2. The are two ways to change the order of products in a collection:\n\n a. Click on the icon, drag the item and release it on the desired position.\n\n > ℹ️ You cannot use this option if a filter is active.\n\n b. Select the box of products you wish to change and click on `Move to Position`. Enter the number of the new position and click on `Move` to complete the change. These options allows you to rearrange items in bulk.\n\n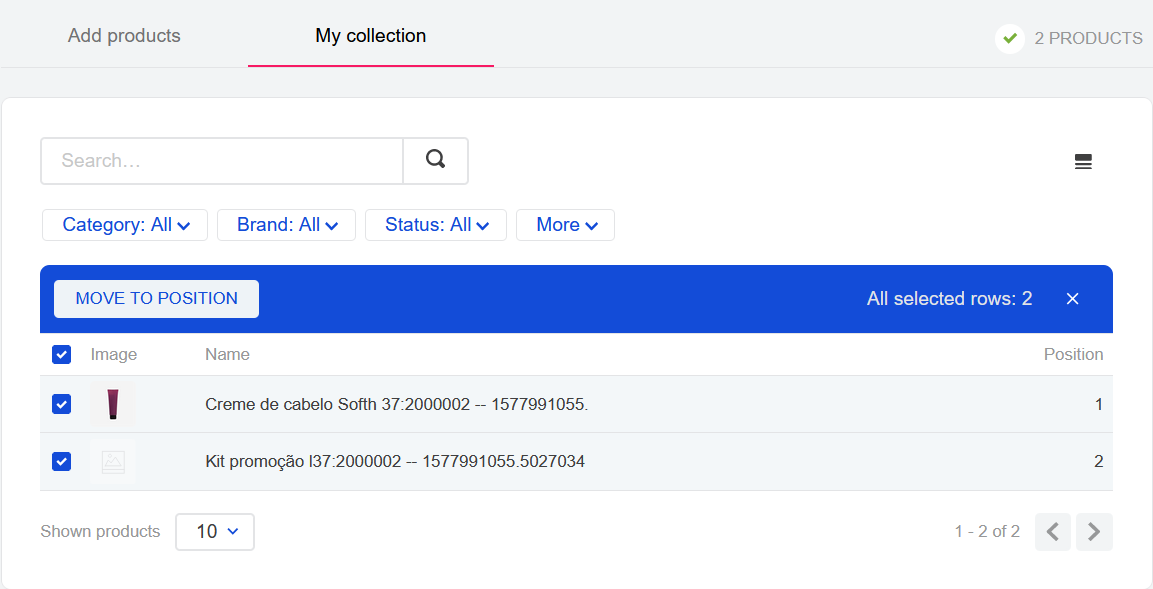\n\n### Export collection spreadsheet\n\nYou can see which products are in your collection by exporting a spreadsheet, as follows:\n\n1. In the __Collections__ page, click on the `Export` button.\n2. Choose the export format, either CSV or XML.\n3. Select if you want to receive the spreadsheet by email or to download it directly to your computer.\n4. Finally, click on `Export`. The file will be downloaded or forwarded to your email, depending on which option you selected above.\n\n### Delete and edit a collection\n\nTo delete a collection, click on the icon in your collection list.\n\nIf you want to edit a collection, follow the steps below:\n\n1. Click the collection you want to edit.\n2. Click on the `Collection Settings` button.\n3. Make the desired changes.\n4. Click on `Save`.\n\n## Collection status\n\nCollections have three different states:\n\n- **Active**: a collection is active when the start date is earlier than or the same as the current date, and the end date is later than the current date.\n- **Inactive**: a collection is inactive when the end date is earlier than the current date.\n- **Scheduled**: a collection is scheduled when the start date is later than the current date."}