{"section":"tutorials","requestedLocale":"en","requestedSlug":"how-to-set-up-fingerprint-for-payu","locale":"en","slug":"how-to-set-up-fingerprint-for-payu","path":"docs/en/tutorials/payments/payment-settings/how-to-set-up-fingerprint-for-payu.md","branch":"main","content":"__Device Fingerprint__ is an identifier that acts in payment processing to improve fraud risk analysis. \n\nBy collecting non-sensitive data, Device Fingerprint identifies and analyzes the security level of the device used to perform a given transaction. It also analyzes transactions previously performed with that device.\n\n> ℹ️ Each store must have only one Device Fingerprint registered. Check if you have already registered the Device Fingerprint in another connector, before proceeding with the steps below.\n\nThis article will explain how to associate the Device Fingerprint feature with the PayU affiliation.\n\n> ℹ️ The settings documented in this article take place in an environment that is external to VTEX, therefore they may be outdated.\n\n1. Login on http://www.google.com/tagmanager/ for the stored to be set up;\n2. Enter the tags section to set up the device session id;\n3. Crete an “HTML Personalized” product with the following image:\n  ![payU 1](https://cdn.statically.io/gh/vtexdocs/help-center-content/refs/heads/main/docs/en/tutorials/payments/payment-settings/how-to-set-up-fingerprint-for-payu_1.png)
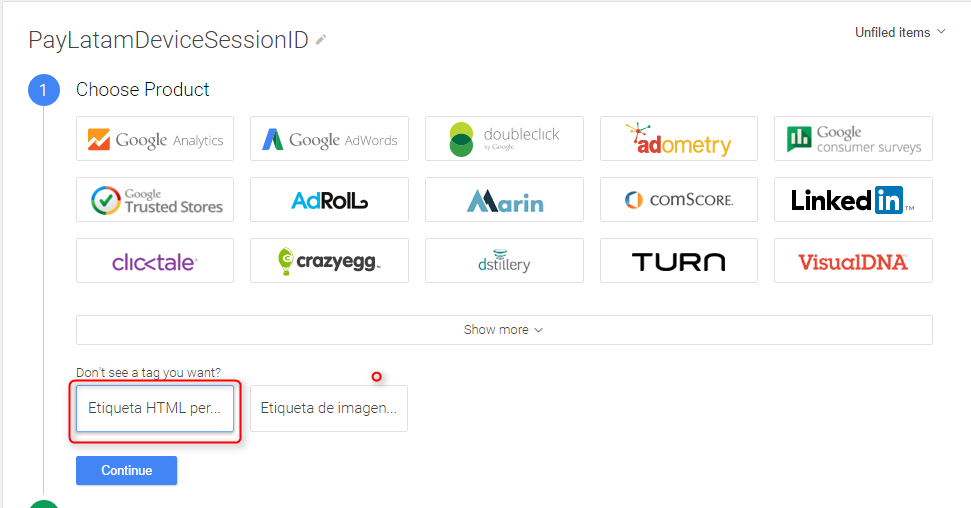
\n4. In the HTML field of the setup, find the HTML code that calls the code to send information to PayU:\n\n```\n<script src=\"/arquivos/md5.js\"></script>\n\n<script>\n       function getCookie(cname) {\n       var name = cname + \"=\";\n       var ca = document.cookie.split(';');\n       for(var i=0; i<ca.length; i++) {\n               var c = ca[i].trim();\n               if (c.indexOf(name) == 0) return c.substring(name.length, c.length);\n       }\n       return \"\";\n   }\n   function microtime(get_as_float) {\n       var now = new Date().getTime() / 1000;\n       var s = parseInt(now, 10);\n\n       return (get_as_float) ? now : (Math.round((now - s) * 1000) / 1000) + ' ' + s;\n   }\n\n   vtexjs.checkout.getOrderForm().done(function(orderForm){ // hala el valor de userProfileId\n       var uid = getCookie('VtexIdclientAutCookie') + orderForm.userProfileId;\n       var deviceSessionId = CryptoJS.MD5(uid+microtime());\n       console.log(\"dsid: \"+deviceSessionId);\n\n       window.vtex.deviceFingerprint = deviceSessionId;\n\n       console.log(\"fingerprint: \"+window.vtex.deviceFingerprint);\n\n       document.getElementById('gtm').innerHTML = '<p>'+'<img src=\"https://cdn.statically.io/gh/vtexdocs/help-center-content/refs/heads/main/docs/en/tutorials/payments/payment-settings/how-to-set-up-fingerprint-for-payu_1.png\"+deviceSessionId+'80200\">';\n       document.getElementById('maf').innerHTML = '<object type=\"application/x-shockwave-flash\" data=\"https://maf.pagosonline.net/ws/fp/fp.swf?id='+deviceSessionId+'80200\" width=\"1\" height=\"1\" id=\"thm_fp\"><param name=\"movie\" value=\"https://maf.pagosonline.net/ws/fp/fp.swf?id='+deviceSessionId+'80200\" /></object>';\n\n       var pol_script = document.createElement('script');\n       pol_script.type = 'text/javascript';\n       pol_script.src = 'https://maf.pagosonline.net/ws/fp/check.js?id='+deviceSessionId+'80200';\n       document.getElementById(\"gtm\").appendChild(pol_script);\n   }); // JavaScript Document\n</script>\n\n<div id=\"gtm\"></div>\n<div id=\"maf\"></div>\n```\n\n![payU 2](https://cdn.statically.io/gh/vtexdocs/help-center-content/refs/heads/main/docs/en/tutorials/payments/payment-settings/how-to-set-up-fingerprint-for-payu_2.png)
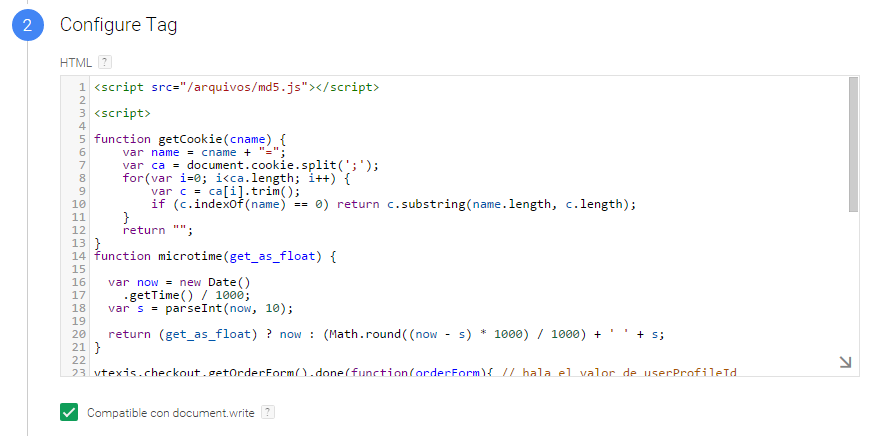
\n\nIt is then necessary to continue on to advanced set up in accordance with the following image:\n  ![payU 3](https://cdn.statically.io/gh/vtexdocs/help-center-content/refs/heads/main/docs/en/tutorials/payments/payment-settings/how-to-set-up-fingerprint-for-payu_3.png)
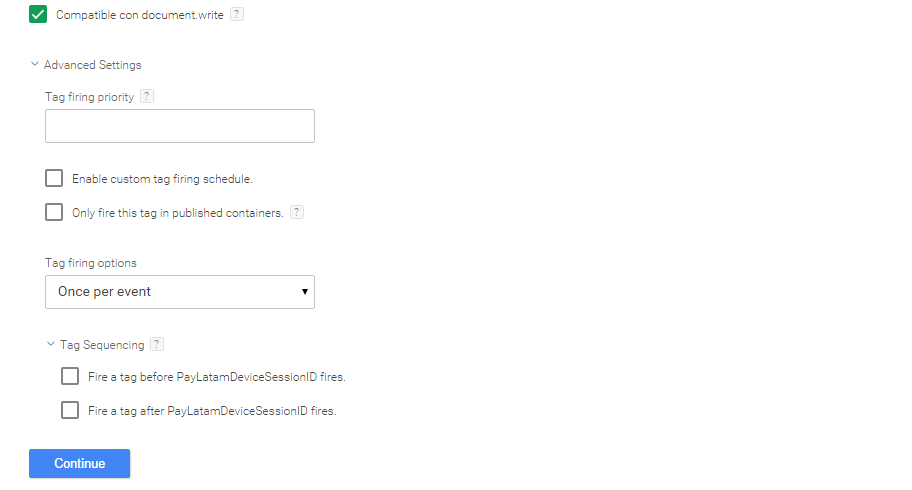
\n\nTo set up the event, follow these steps:\n\n1. Click on the tab More:\n  ![payU 4](https://cdn.statically.io/gh/vtexdocs/help-center-content/refs/heads/main/docs/en/tutorials/payments/payment-settings/how-to-set-up-fingerprint-for-payu_4.png)\n2. Create a personalized event:\n  ![payU 5](https://cdn.statically.io/gh/vtexdocs/help-center-content/refs/heads/main/docs/en/tutorials/payments/payment-settings/how-to-set-up-fingerprint-for-payu_5.png)
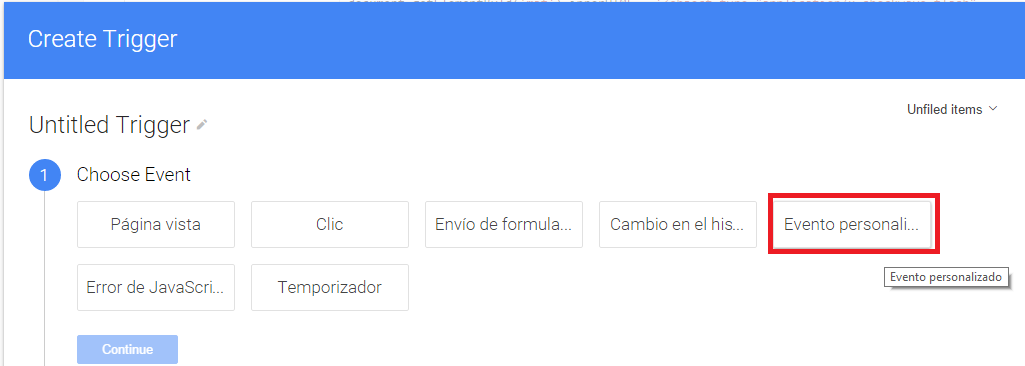
\n3. Fill it in as follows:\n  ![payU 6](https://cdn.statically.io/gh/vtexdocs/help-center-content/refs/heads/main/docs/en/tutorials/payments/payment-settings/how-to-set-up-fingerprint-for-payu_6.png)
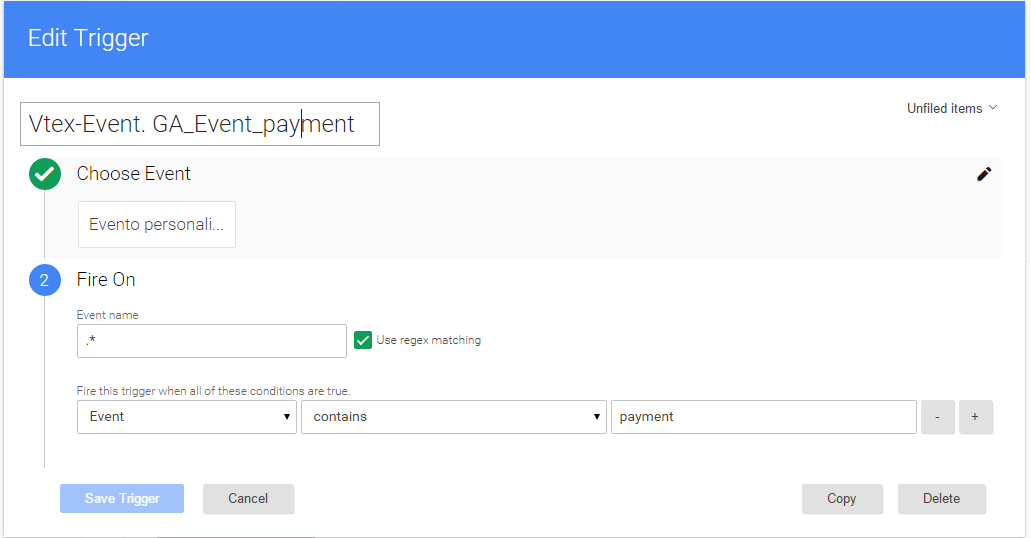
\n4. We save the event and subsequently save the tag (tag):\n  ![payU 7](https://cdn.statically.io/gh/vtexdocs/help-center-content/refs/heads/main/docs/en/tutorials/payments/payment-settings/how-to-set-up-fingerprint-for-payu_7.png)
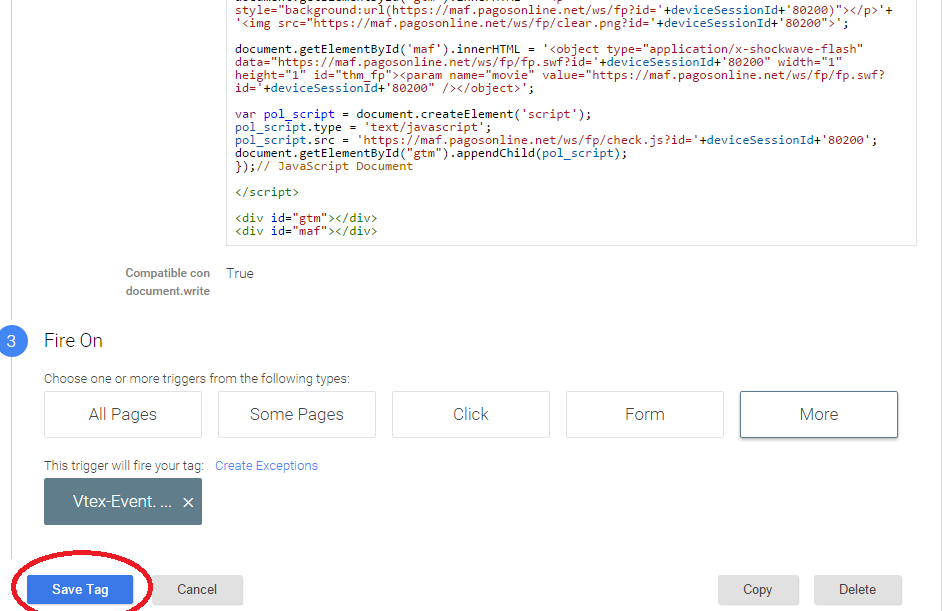
\n5. Once the tag has been saved, it is necessary to publish it:\n  ![payU 8](https://cdn.statically.io/gh/vtexdocs/help-center-content/refs/heads/main/docs/en/tutorials/payments/payment-settings/how-to-set-up-fingerprint-for-payu_8.png)
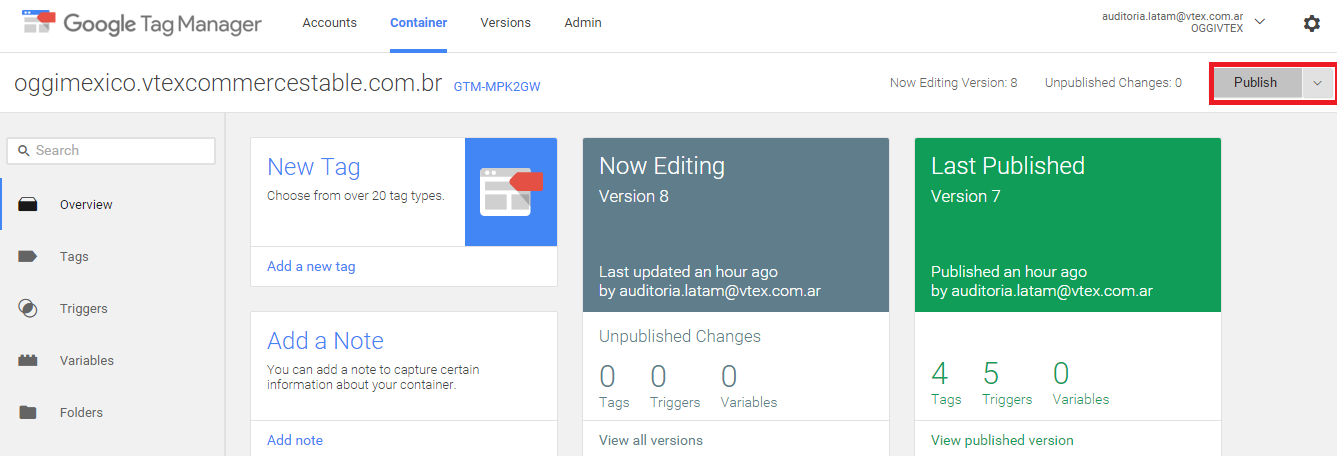
\n\nOnce the tag has been set up, it is necessary to save the JS captured from the code. This is saved in the VTEX file manager. To do this, follow these steps:\n\n- Accessing the VTEX panel in the CMS menu >> Layout >> File Manager >> .js File Management >> Add.\n\n![cms js](https://cdn.statically.io/gh/vtexdocs/help-center-content/refs/heads/main/docs/en/tutorials/payments/payment-settings/how-to-set-up-fingerprint-for-payu_9.png)
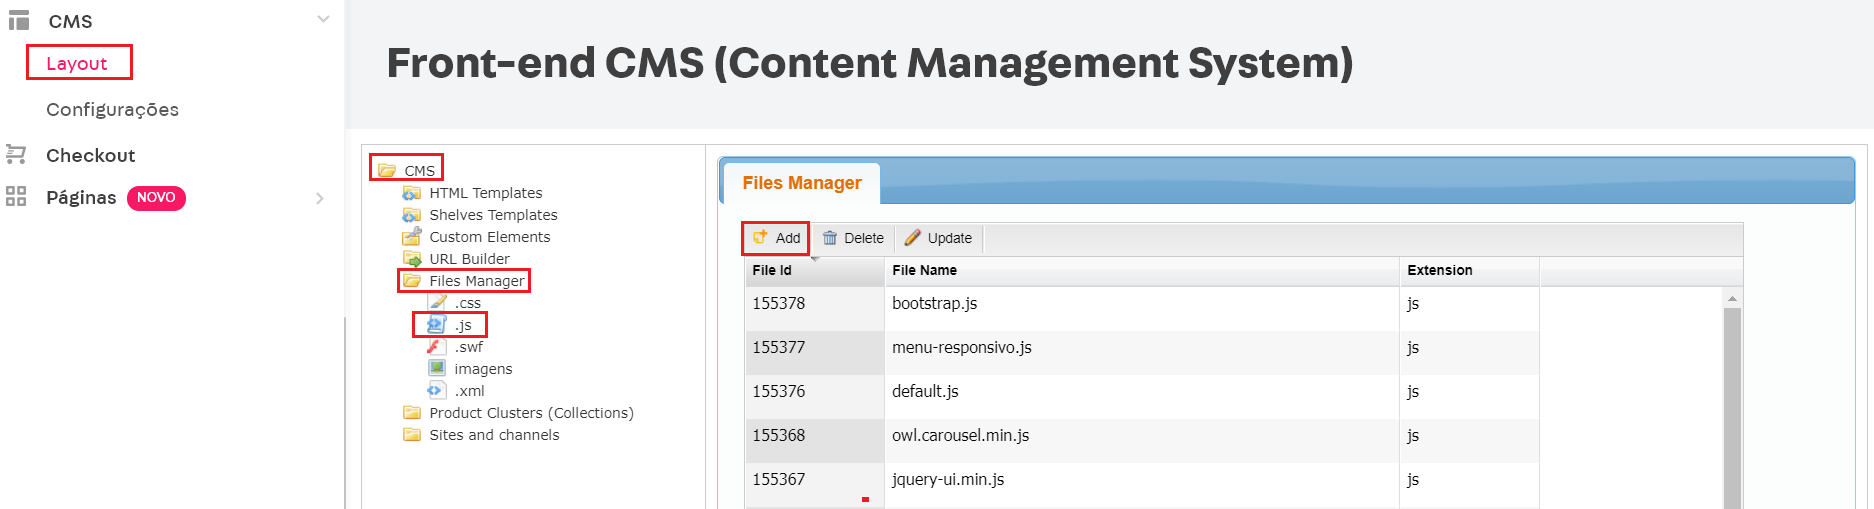
\n\n__Attachment__: [md5.js](https://cdn.statically.io/gh/vtexdocs/help-center-content/files-migration-script/docs/en/tutorials/payments/payment-settings/md5.js)\n\n### Validation\n\nTo validate it, it is necessary to enter the store and to complete the purchase process. When we arrive at the payment method, we validate the JS execution:\n\n1. Right click on the purchase button \n2. Select Inspect Element\n3. Search for the word MAF\n\nIf the result is found, it means that the setup is correct and that Fingerprint is working properly. For example:\n\n
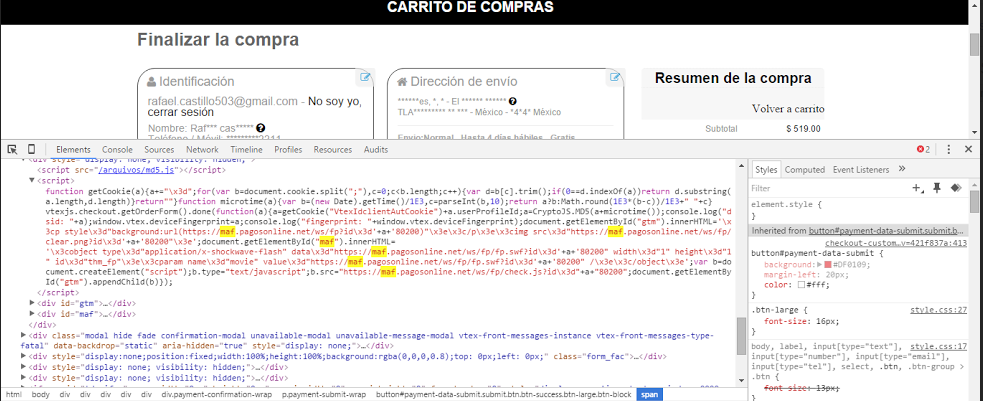
![payU 9](https://cdn.statically.io/gh/vtexdocs/help-center-content/refs/heads/main/docs/en/tutorials/payments/payment-settings/how-to-set-up-fingerprint-for-payu_10.png)"}