{"section":"tutorials","requestedLocale":"en","requestedSlug":"how-to-assemble-an-outfit","locale":"en","slug":"how-to-assemble-an-outfit","path":"docs/en/tutorials/catalog/bundle/how-to-assemble-an-outfit.md","branch":"main","content":"> ⚠️ Tutorial valid only for Legacy CMS Stores.\n\nLearn how to set up an Outfit (previously called Kit Look) in VTEX.\n\nBefore talking about the Outfit, it is important to remind you that you should know how to create a bundle (previously called kit). To do so, access the article [Bundle registration](/en/docs/tutorials/bundle-registration).\n\nThe following table describes the characteristics and scenarios for using a bundle or an outfit:\n\n| **Type** | **Definition** | **Example** |\n| :---: | :--- | :--- |\n| [Bundle](/en/docs/tutorials/what-is-a-bundle) | <ul><li>The components form a set that can't be divided, and customers can't pick individual items from it.</li><li>The store may or may not offer individual components separately.</li></ul> | A men's fashion store offers a \"Father's Day\" bundle that includes a pair of shoes, a pair of socks, and a keychain. The customer isn't interested in the keychain, but likes the shoes and the socks, so they buy the bundle because items aren't sold separately. |\n| Outfit | <ul><li>The components are a buy-together suggestion and customers can pick and choose whatever items they want to buy from the outfit. Usually known as \"Shop the Look\".</li><li>The store always offers individual components separately.</li></ul> | A women's fashion store offers a \"Summer\" outfit that includes a bikini, a cover-up, and sandals. The customer doesn't like the sandals and only buys the bikini and the cover-up. |\n\n### What is the Outfit?\n\nThis term is widely known in the Fashion Segment. An Outfit is a way through which you can buy several products viewing only one product screen. \n\n![](https://cdn.statically.io/gh/vtexdocs/help-center-content/refs/heads/main/docs/en/tutorials/catalog/bundle/how-to-assemble-an-outfit_1.gif)
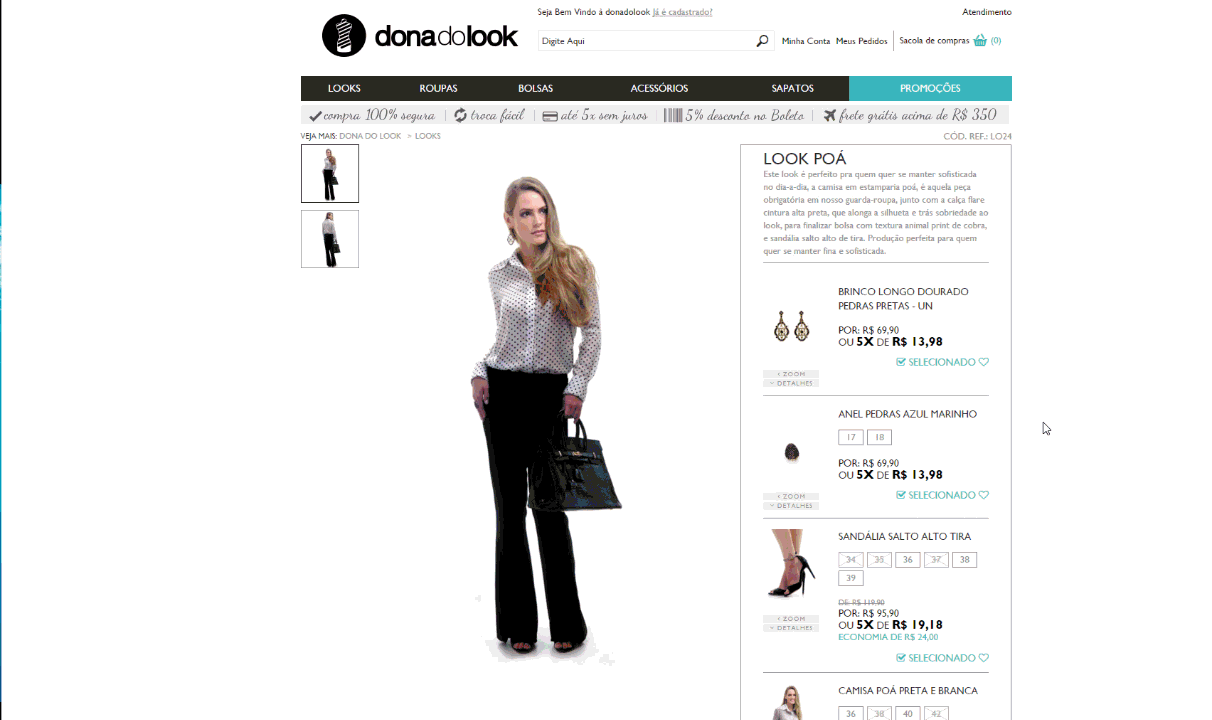
\n\nIn the layout above, it is possible to choose the Outfit items the customer would like to buy and then click on “Comprar Produtos Selecionados”.\n\nAlternatively, if you prefer, you may buy the complete look, with all selected items.\n\n![](https://cdn.statically.io/gh/vtexdocs/help-center-content/refs/heads/main/docs/en/tutorials/catalog/bundle/how-to-assemble-an-outfit_2.gif)
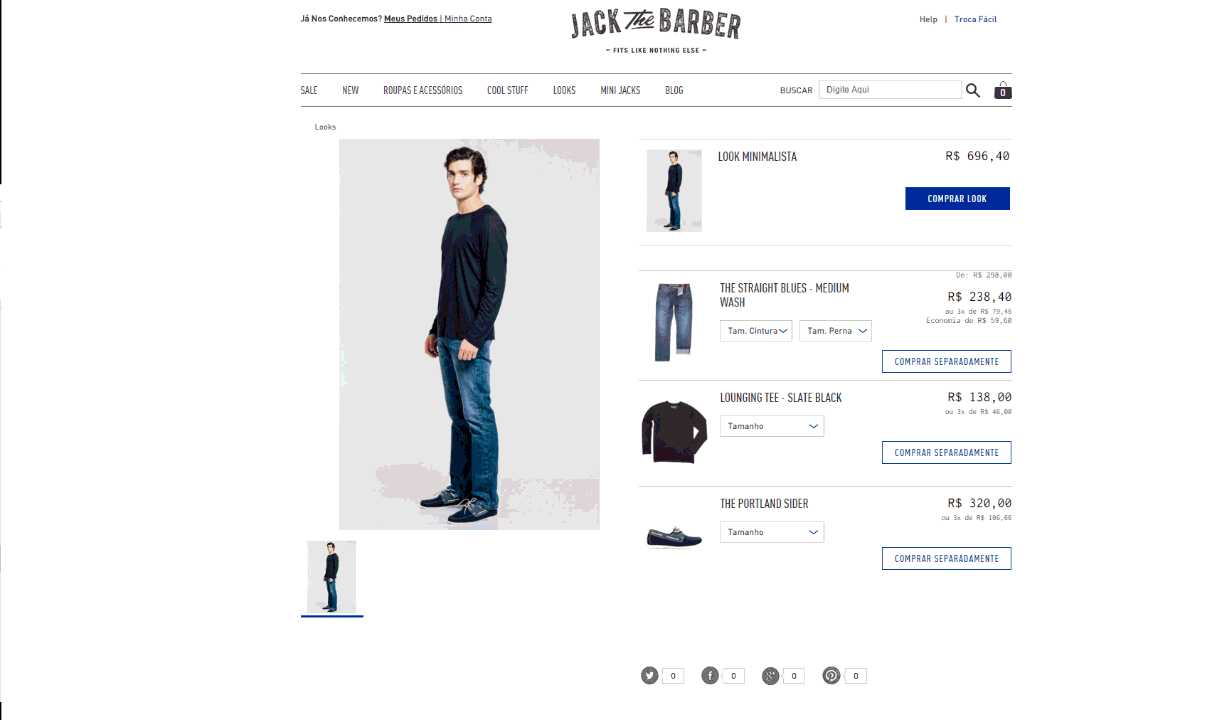
\n\nIn this layout, for each item there is a button “Comprar Separadamente”.\n\nIf you prefer to buy the complete look, just click on “Comprar Look”.\n\nBy clicking on Comprar, regardless of the layout, all components will be added to your cart automatically and individually, i.e., if the Outfit has 4 items, the 4 items will be added.\n\nIn the layout it is possible to define the amount of default items for each component.\n\n### Implementation of Kit pages\n\n```\n<div id=\"top-right\">\n                        <span id=\"selecione-kit\">SELECIONE AS PEÇAS DO LOOK</span>\n                        \n                        <div class=\"kit clearfix\">\n                            <div class=\"kit-info\">\n                                <div class=\"kit-image\">\n                                    <vtex.cmc:ProductImage productIndex=\"1\" />\n                                </div>\n                                <div class=\"tpl-right\">\n                                    <div class=\"nome-kit\"><h2><vtex.cmc:productName productIndex=\"1\" /></h2></div>\n                                    <div class=\"skuSelection\">\n                                        <vtex.cmc:skuSelection changeImage=\"1\" productIndex=\"1\" />\n                                    </div>\n                                    <div class=\"dv-buy-button clearfix\">\n                                        <vtex.cmc:BuyInPage productIndex=\"1\" />\n                                    </div>\n                                    <div class=\"preco-kit\">\n                                        <vtex.cmc:skuPrice productIndex=\"1\" />\n                                    </div>\n                                </div>\n                            </div>\n                        </div>\n                        \n                        \n                        <div class=\"kit clearfix\">\n                            <div class=\"kit-info\">\n                                <div class=\"kit-image\">\n                                    <vtex.cmc:ProductImage productIndex=\"2\" />\n                                </div>\n                                <div class=\"tpl-right\">\n                                    <div class=\"nome-kit\"><h2><vtex.cmc:productName productIndex=\"2\" /></h2></div>\n                                    <div class=\"skuSelection\">\n                                        <vtex.cmc:skuSelection changeImage=\"1\" productIndex=\"2\" />\n                                    </div>\n                                    <div class=\"dv-buy-button clearfix\">\n                                        <vtex.cmc:BuyInPage productIndex=\"2\" />\n                                    </div>\n                                    <div class=\"preco-kit\">\n                                        <vtex.cmc:skuPrice productIndex=\"2\" />\n                                    </div>\n                                </div>\n                            </div>\n                        </div>\n                        \n                        \n                        <div class=\"kit clearfix\">\n                            <div class=\"kit-info\">\n                                <div class=\"kit-image\">\n                                    <vtex.cmc:ProductImage productIndex=\"3\" />\n                                </div>\n                                <div class=\"tpl-right\">\n                                    <div class=\"nome-kit\"><h2><vtex.cmc:productName productIndex=\"3\" /></h2></div>\n                                    <div class=\"skuSelection\">\n                                        <vtex.cmc:skuSelection changeImage=\"1\" productIndex=\"3\" />\n                                    </div>\n                                    <div class=\"dv-buy-button clearfix\">\n                                        <vtex.cmc:BuyInPage productIndex=\"3\" />\n                                    </div>\n                                    <div class=\"preco-kit\">\n                                        <vtex.cmc:skuPrice productIndex=\"3\" />\n                                    </div>\n                                </div>\n                            </div>\n                        </div>\n                        \n  </div>\n```\n\nThe **_BuyInPage_** control, described in the code above, will work only with the **_AmountItemsInCart_** control (in the template itself or in any related sub template).\n\nTo understand the relationship between these controls see the [Complete List of Controls](/en/tutorial/list-of-controls-for-templates/).\n\n`changeImage=”1″`: indicates which field will change the sku image when selected.\n\nThis template should be associated with a new Product Page Layout to be applied only in the category where the Kits are registered. In order to not create multiple templates, just insert the same code more often - changing the value of _**productIndex**_.\n\n**Example 1:** If you have a kit product with the 3 components and another kit product with 5 components, and you wish to use this Look Kit functionality for both kit products, it is not necessary to create a template for each quantity. You may create a template with 5 component control groups (_productIndex=maximumNumber_). Understanding that _maximumNumber_ is the value of the kit with the largest number of components.\n\n**Example 2:** When _productIndex=0_, is used, information on the Kit itself will be displayed. On the product page that contemplates a kit with 2 components, only the 2 components will be shown. If there is a kit with 4 components, the 4 will be displayed.\n\nIn summary, the store may create a template with the quantity of _product index_ it wants. Only the number of components in each kit will be displayed on the product page."}