{"section":"tutorials","requestedLocale":"en","requestedSlug":"configuring-banners","locale":"en","slug":"configuring-banners","path":"docs/en/tutorials/intelligent-search/banners/configuring-banners.md","branch":"main","content":"To set up a banner, follow the steps below:\n\n1. In the VTEX Admin, go to **Storefront**, or type **Storefront** in the search bar at the top of the page.\n2. Click **Banners**.\n3. Click `New`.\n4. Complete the banner fields.\n5. To finish, click `Save`.\n\nAfter configuring the banner, you have to add it to a page on your store. To do that, follow the steps described in the [Banner](https://developers.vtex.com/docs/apps/vtex.search/banner) guide.\n\n> ℹ️ This feature is available on VTEX Intelligent Search Multilanguage. For more information, please refer to our article [VTEX Intelligent Search: Multilanguage settings (Beta)](/en/docs/tutorials/vtex-intelligent-search-multilanguage-settings-beta#banners).\n\n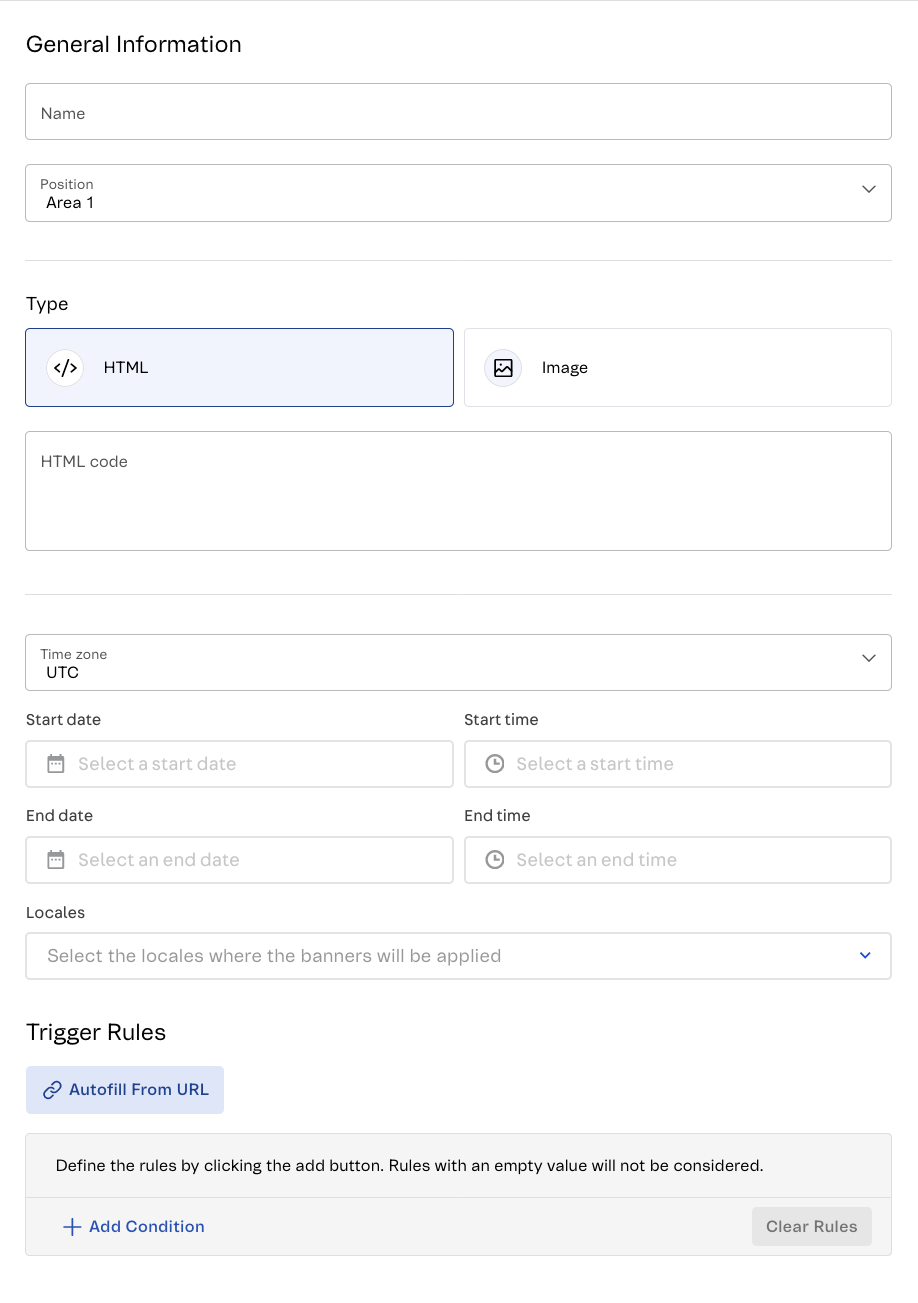\n\n## Banner fields\n\nTo add a banner, the following fields need to be completed:\n\n### General Information\n\n* **Name**: Name of the banner.\n* **Position**: Position where the banner will be displayed on the search results page. Banners can be positioned in four different areas of the site page. The placing is up to the retailer and will be determined by the option selected in this field or defined through [store-theme blocks](https://developers.vtex.com/docs/apps/vtex.search/banner#props).\n\n### Type\n\n* **Banner type**: Banner content that will be created. The banner can be HTML code or an image URL:\n * **HTML**: The administrator can add media, YouTube videos, images, or code lines, such as JavaScript, to the HTML field.\n * **Image**: The system requests the image URL that will be used and the banner destination link.\n * Image URL\n * Destination link\n* **Time zone**: Time zone for the times configured in the banner.\n* **Start date**: Date when the banner will start being available.\n* **Start time**: Time when the banner will start being available.\n* **End date**: Date when the banner will stop being available. This allows the administrator to schedule future campaigns, which makes them easier to control.\n* **End time**: Time when the banner will stop being available.\n* **Locales:** Languages to which the banner will apply. The field is only available for stores using [Multilanguage settings (Beta)](/en/docs/tutorials/vtex-intelligent-search-multilanguage-settings-beta).\n\n### Trigger Rules\n\n**Trigger rules** are a group of conditional terms or filters that are applied to every search. You need to have at least one condition, whether by term or by filter.\n\nClick `Autofill from URL` to add the URL of the search page to the trigger rules that will be applied.\n\n\n\nClick `Add condition` to create a rule. Rules can be of two types:\n\n* **Term**: The word searched by the customer that will be associated with the rule.\n* **Filter**: Predefined attribute that can be selected which restricts the search results. You can select categories, departments, and subcategories.\n\nClick `Clear Rules` to delete all the rules."}