{"section":"tutorials","requestedLocale":"en","requestedSlug":"account-management","locale":"en","slug":"account-management","path":"docs/en/tutorials/account-management/accounts/account-management.md","branch":"main","content":"The **Account** page allows you to view and manage your VTEX account details. To access it, click your **profile avatar** that has the first letter of your email, and click **Account Settings** > **Account.**\n\n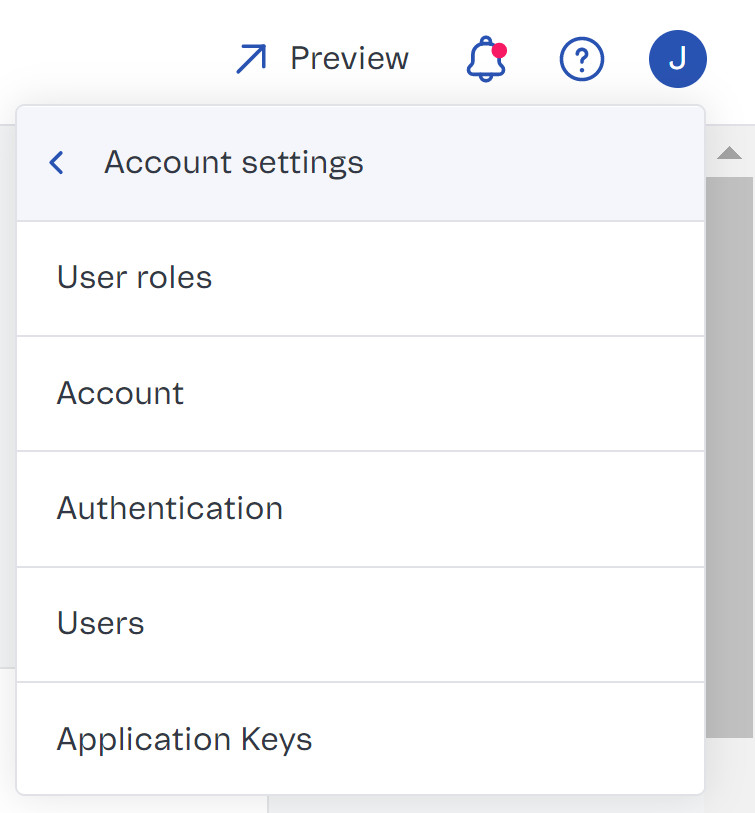\n\n> ⚠️ This screen has no application key details. Learn where to find and manage this information in the article [Application Keys](/en/docs/tutorials/api-keys).\n\nThe **Account** page is divided into two tabs: [General](#general) and [Stores](#stores). Learn more about each tab below.\n\n## General\n\nThe **General** tab's features are available in the [Details](#details), [Company Information](#company-information), and [Owner](#owner) sections. This tab allows you to:\n\n\n\nThis tab allows you to:\n\n- View [account details](#details).\n- View and edit [company information](#company-information).\n- View [account-sponsor-user information](#sponsor).\n\n### Details\n\nIn this section, you can check the basic information of your VTEX account.\n\n\n\n- **Main account name:** [VTEX account name](/en/docs/tutorials/what-is-an-account-name).\n- **Creation date:** The date your account was created.\n- **Account ID:** The unique code that identifies your account.\n- **Go-live date:** The date your account was activated and available for configuration and store implementation.\n- **Account status:** Indicates whether your account is in production or not. An account in production is the first step to [making your store available for customers in a public domain](/en/tracks/realizando-o-go-live-da-sua-loja--4Ns5FxIiksmjsdX2yOTduM). This status can be either **in production** or **not in production**.\n- **Admin platform status:** Indicates whether or not your account is active, which means that the VTEX Admin and APIs are available for the configuration and deployment of your store. This status can be **Active** or **Inactive**.\n\n### Company information\n\nIn this section, you will see the following information about your company:\n\n- Logo\n- Trading name\n- Company registration number\n\n\n\n#### Editing company information\n\nYou can edit the company information by following the steps below:\n\n1. Go to the **Account** page by clicking your **profile avatar** that has the first letter of your email address, and then go to **Account Settings** > **Account**.\n2. Go to the **Company Information** section.\n3. Click `Edit`.\n4. Change the desired information regarding:\n\t- **Logo**\n\t- **Trading name**\n\t- **Legal name**\n\t- **Company reg. no.**\n5. Click `Save`.\n\n> ⚠️ Your logo must be a JPG, GIF, or PNG file with a maximum size of 800 KB.\n\n### Sponsor\n\nThis section displays the account sponsor details. Each VTEX account has only one sponsor account, which has full access to all Admin sections, including important maintenance and authorization actions.\n\n> ℹ️ Learn more about the [sponsor user](/en/docs/tutorials/what-is-the-sponsor-user).\n\n\n\nIf you are the sponsor user, you can [transfer store ownership](/en/tutorial/transferencia-de-propriedade-da-loja) in this section. This allows you to transfer the store's ownership to another user.\n\n## Stores\n\nIn the Stores tab, you can:\n\n- View [store list](#stores).\n- [Add new store](#creating-a-store).\n- [Edit store](#editing-a-store).\n- [Delete store](#deleting-a-store).\n\nBy clicking the **Stores** tab at the top of the screen, you will see a list with all the information of all the stores created in your VTEX account.\n\n\n\nFor each store, you can view the following details:\n\n- **Store name:** Name that will identify your store.\n- **Trading name:** Business name of your store.\n- **Hosts:** Domains related to the store.\n\nYou can use the search box to filter the stores displayed in the list by any of the attributes.\n\nYou can also [create a new store](#create-store), [edit a store](#edit-store), or [delete](# delete-store) existing stores.\n\n### Creating a store\n\nFollow the steps below to create a store:\n\n1. Go to the **Account** page by clicking your **profile avatar** that has the first letter of your email, and then go to **Account Settings** > **Account**.\n2. Click the **Stores** tab at the top of the screen.\n3. Click the `+ New Store` button.\n4. Fill in the basic store information:\n\t- **Store name:** Name that will identify your store.\n\t- **Trading name:** Business name of your store.\n\t- **Locale:** Preset language associated with this store.\n\t- **Sales channel:** [Sales channel](/en/tutorial/como-funciona-uma-politica-comercial--6Xef8PZiFm40kg2STrMkMV#) you want to associate with the new store.\n5. If you wish to start the [go-live](/en/tracks/realizando-o-go-live-da-sua-loja--4Ns5FxIiksmjsdX2yOTduM) process for your store, fill in the **Hosts** field with [your store's domain](/en/tutorial/configurando-dominios-no-license-manager). Otherwise, leave it blank.\n6. Click the `Create` button.\n\n> ℹ️ To learn more about configuring your store's **Hosts**, read the article [Configure your store domain](/en/docs/tutorials/configuring-the-store-domain).\n\n> ⚠️ Do not use a \".com\" domain in the Store Name field. This type of entry can only exist in the Hosts field.\n\n### Editing a store\n\nFollow the steps below to edit information from an existing store:\n\n1. Go to the **Account** page by clicking your **profile avatar** that has the first letter of your email, and then go to **Account Settings** > **Account**.\n2. Click the **Stores** tab at the top of the screen.\n3. Click the action button corresponding to the store you want to edit.\n4. Click `Edit`.\n5. You will see the account edit page. Edit the information you want.\n6. Click `Save`.\n\n### Deleting a store\n\nFollow the steps below to delete a store:\n\n1. Go to the **Account** page by clicking your **profile avatar** that has the first letter of your email, and then on **Account Settings** > **Account**.\n2. Click the **Stores** tab at the top of the screen.\n3. Click the action button corresponding to the store you want to delete.\n4. Click `Delete`.\n5. You will see a confirmation modal. Click `Delete`.\n\nThe name of the removed store cannot be used again.\n\n> ⚠️ Note that the main store, indicated with a star next to its name in the store list, cannot be deleted.\n\n## Learn more\n\n- [What is an account name?](/en/docs/tutorials/what-is-an-account-name)\n- [Sponsor user](/en/docs/tutorials/what-is-the-sponsor-user)\n- [Transferring store ownership](/en/tutorial/transferencia-de-propriedade-da-loja)\n- [Configure your store's domain](/en/docs/tutorials/configuring-the-store-domain)\n- [Go-live](/en/tracks/realizando-o-go-live-da-sua-loja--4Ns5FxIiksmjsdX2yOTduM)"}