{"section":"tutorials","requestedLocale":"en","requestedSlug":"setting-up-the-sales-funnel-on-google-analytics","locale":"en","slug":"setting-up-the-sales-funnel-on-google-analytics","path":"docs/en/tutorials/projects-and-integrations/setting-up-the-sales-funnel-on-google-analytics.md","branch":"main","content":"**Google Analytics** goals are meant to help you evaluate whether your site's goals are being met. This article will show you how to set up a conversion goal, known as __Sales Funnel__, in stores that use VTEX SmartCheckout. To learn more about goals, visit the conversion topic in Google Analytics Help.\n\nWith the sales funnel configured, you can track and analyze the customer's steps until the completion of an order. To set up the sales funnel, let's take into account that the purchase process starts on your product screen and goes through the shopping cart, checkout (personal data, shipping, payment) and reaches the goal, which is the order placed page.\n\n> ℹ️ To make it easier, the entire setup in this article can be [imported directly into Google Analytics](https://support.google.com/analytics/answer/1032415?hl=en) with [this template](https://analytics.google.com/analytics/web/template?uid=tTp2GkIJRiGodszJbq8RsA).\n\nFor manual configuration or editing of an existing goal, the first step is to access Analytics and click on the __Administrator__ button in the lower left corner. Then go to the __Goals__ option, from the \"View\" column.\n\n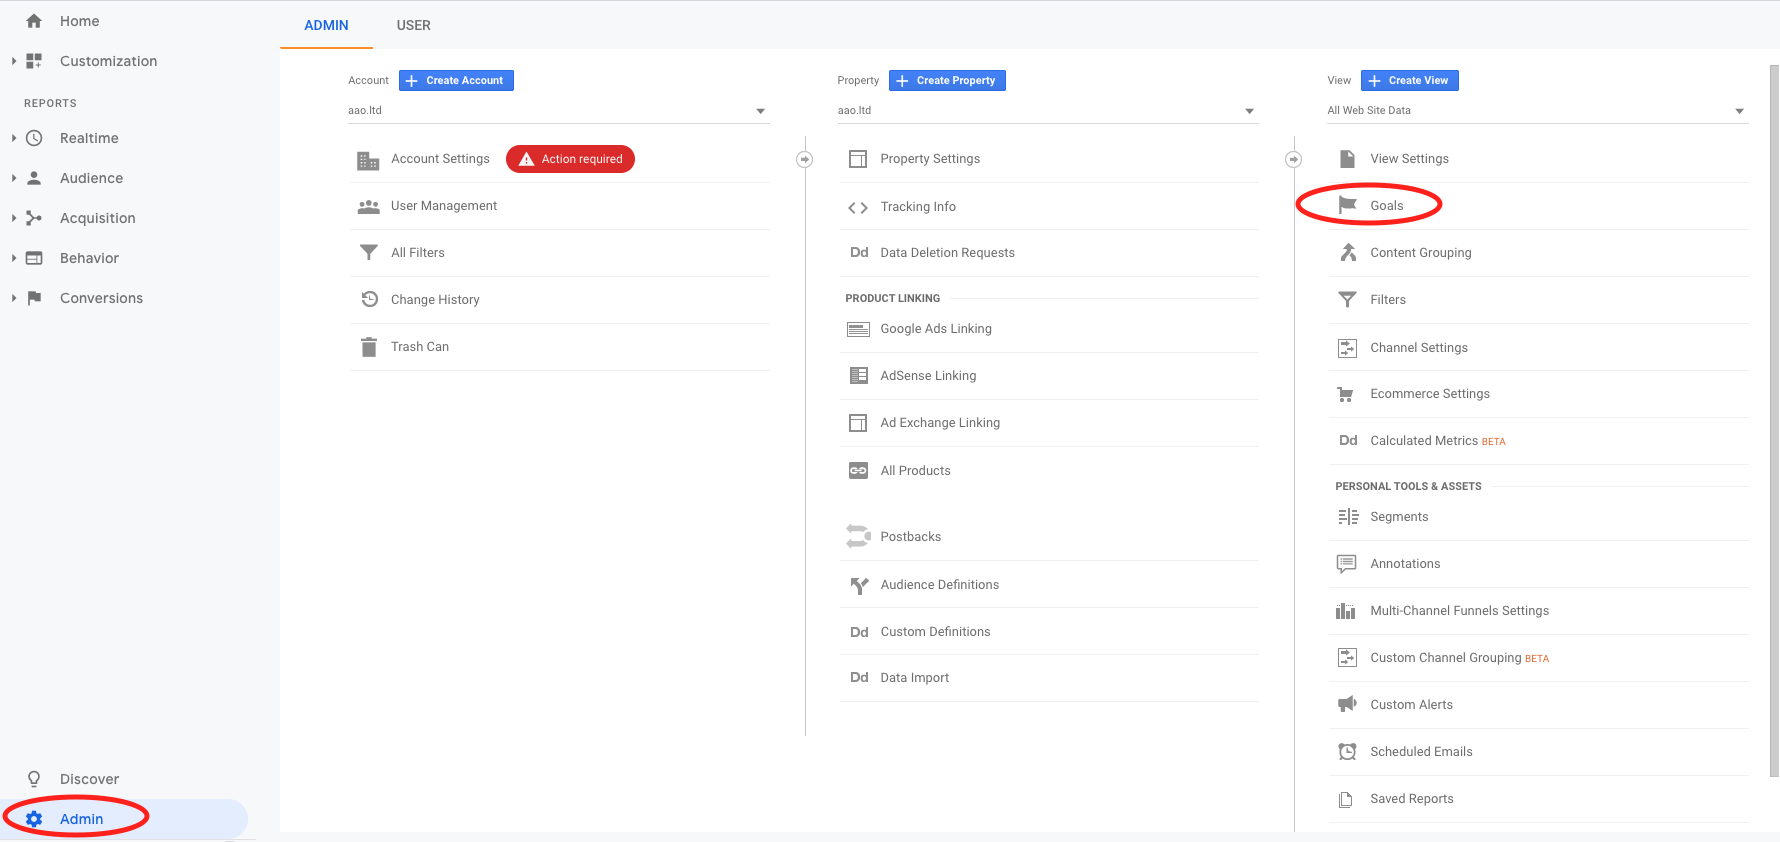\n\nIn the goal administration screen, choose to create a new goal or to edit an existing one.\n\n__In step 1__ you can follow with a custom type goal:\n\n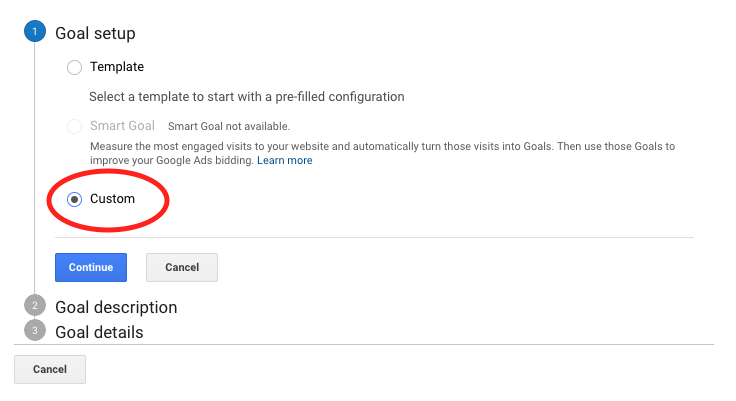\n\n__In step 2__ you can define the name you prefer for your goal and a position code (for internal Google Analytics use). In type, let's use \"Destination\":\n\n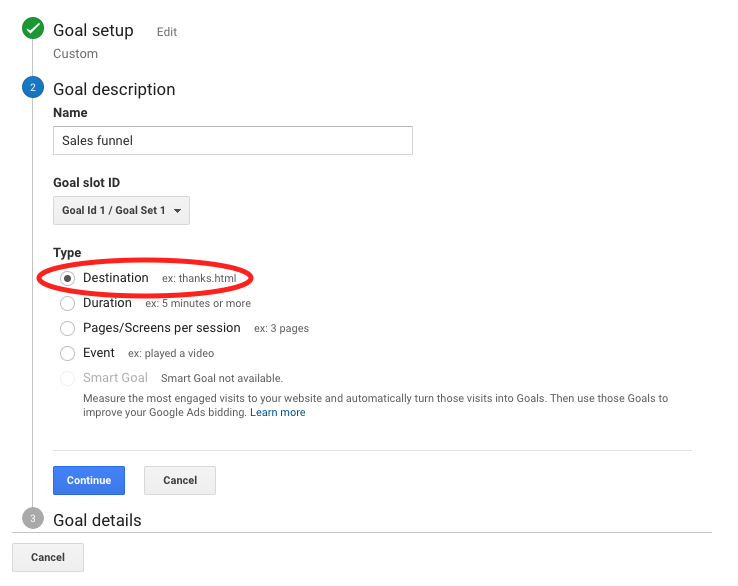\n\n__In step 3__ we have the most sensitive settings. In it we set the page that determines the completion of the goal and the path the clients will take to reach it.\n\nIn the \"Destination\" field select the regular expression option and enter the URL of the order placed page: `^/checkout/orderPlaced`\n\n\n\nThen configure the path that the client will go through until an order is finished. In such case, we're taking into account that the purchase process starts on the product screen; then my funnel will serve to measure the number of customers who access this screen, how many orders have been finished and at which step customers are giving up the purchase.\n\nStill __in step 3__, enable the __Funnel__ option with the following steps:\n\n1. __Product__ = `/p($|\\?)` (not required)\n2. __Cart__ = `^/checkout/(\\?.*)?(#/cart)$`\n3. __Identification__ = `^/checkout/(\\?.*)?#/email$`\n4. __Personal data__ = `^/checkout/(\\?.*)?#/profile$`\n5. __Delivery__ = `^/checkout/(\\?.*)?#/shipping$`\n6. __Payment__ = `^/checkout/(\\?.*)?#/payment$`\n\n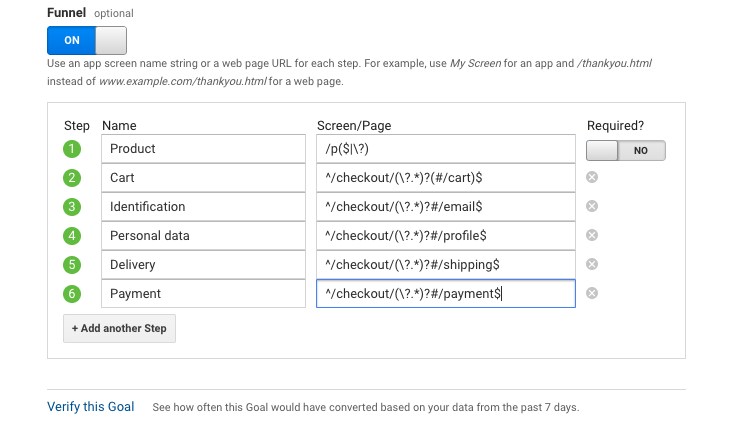\n\nOne way to verify that the goal is set correctly is to use the \"Check this goal\" link. Google will generate a goal conversion simulation within the last 7 days.\n\nNow just save the goal and wait for the time the system needs to start counting the data. Usually it takes 24 hours.\n\nTo view your funnel, see the Analytics reports and go to the __Conversions__ menu and then to the __Goals__ option.\n\n> ⚠️ If you have a multi-language store with languages as [subdirectories of the gTLD](https://support.google.com/webmasters/answer/182192?hl=en#locale-specific-urls) you should replace every [carret](https://support.google.com/analytics/answer/1034376?hl=en&ref_topic=1034375) (`^`) with a [regex](https://support.google.com/analytics/answer/1034324?hl=en) that matches the different subdirectories. For instance, if your website is available in: - **Italian: **`example.com/it`
- **Spanish: **`example.com/es`
- **French: **`example.com/fr`
You would have to change your destination: - **From: **`^/checkout/orderPlaced`
- **To: **`^/(it|es|fr)/checkout/orderPlaced`
This needs to be done for every funnel step as well.\n\n> ⚠️ The funnel settings in this article have been updated to follow the new version of [SmartCheckout shared cart](/en/docs/tutorials/what-is-the-shared-cart). For comparison purposes, see below the old settings: - Product: `/p($|\\?)` (not required)
- Cart: `^/checkout/(#/cart)?$`
- Identification: `^/checkout/#/email`
- Personal Data: `^/checkout/#/profile`
- Delivery: `^/checkout/#/shipping`
- Payment: `^/checkout/#/payment`
"}